


Sweet Pea is 6 years old.

From: I found instructions for this fun and frugal activity from Julie Finn at Crafting a Green World.
Material:
- Several old dried-out markers in a variety of colors.
- Pliers.
- A few small glass or plastic jars with lids. (Julie suggests using old spice jars, but I had some perfect little plastic jars I had bought on clearance in the paint section at Hobby Lobby.)
- 3 Paper plates or pieces of paper.
- Tweezers. (optional)
- Plastic covering for your work area. (Optional, but recommended.)
- Bib or smock for your Tot. (Optional, but recommended.)
")
Procedure:
- Let your tot draw on paper to discover which of your your old markers have dried out.

- Return the still good markers to your art supplies and make a pile of the dried out ones.
- Invite your tot to separate the markers into a few piles by colors. You will need a color pile for each jar of paint that you wish to make.
- Allow your tot to choose a pile of markers to work with first.
- Working with one marker at a time, use the pliers to crush the back end of the marker until the plastic cracks. (This job should only be done by an adult. Please read my Notes from the Trenches below.)
")
- After the tube has cracked, use the pliers to pull the little plug out of the tube and throw it away.
")
- Show your tot how to lightly bang the tube on a piece of paper or a paper plate so that the marker ink well falls out of the barrel.
")
- Invite your tot to drop the ink well into the empty jar.
- Use the pliers to remove the nib and throw it away. Set the barrel and cap aside.
- Repeat with all of the remaining markers in the first color pile, adding each of the ink wells to the jar.
- Allow your tot to fill the container about 3/4 of the way full with water.
")
- Put the lid on the jar if possible. However, if your ink wells are too large, you may have to leave one end sticking up out of the water. Place the jar in an out of the way location. It is especially important to make sure that the jar is unreachable to small children or pets if you can not put the lid on it.
- Repeat the process with the remaining piles of markers until all of the jars are filled.
- If possible, recycle the marker caps and barrels. (Crayola is oddly cagey about revealing the type of plastic used to make the barrels, but Julie says that it is #5.)
- Allow the jars to sit for at least 24 hours. (We let ours sit for a couple of days.)
")
- After most of the ink has leaked out of the ink wells, invite your tot to use the tweezers to remove each of the ink wells from the paint jars.
")
- Allow your tot to squeeze each of the ink wells into the paint jars to extract the last bits of ink from them.
")
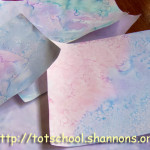
- Repeat for each of the jars and Voila! You have made your own watercolors!
Observations: Sweet Pea had tons of fun with this, even though there wasn’t a whole lot to it.
")
She had trouble waiting for the ink wells to finish soaking into the water and wanted to check on them often. We were surprised by the final color of the watercolors. Our “green” pile turned into an almost black color of paint.
When it was finally time to finish the activity, she especially loved squeezing the last bit of ink out of the wells.
")
The watercolors we created were light when painted on paper, but very usable. I’ll post an activity that involves painting with these watercolors in a couple of weeks.
This activity is probably best suited for mature kindergartners and elementary school children. Younger kids could help sort markers, but I probably wouldn’t want to turn them loose with the messy ink wells.
Notes from the Trenches: One of the marker’s exploded when I crushed it with the pliers. Pieces of plastic flew everywhere. If I had lawyers, they would probably require that I tell you to wear safety goggles during this portion of the activity, and to keep your child out of the room. Someone else suggested using a PVC cutter, and I think that might have worked better.
Clearly, this is messy work.
We only dissembled Crayola markers, but I assume that other brands would work just as well.
Rating: 3 Stars * (Fun, Easy, Frugal)
Link Ups: This post is linked up to It’s Playtime! @ Kid’s Activities Blog.


 "Pin It")

 "Pin It")


[…] DIY Watercolors from Upcycled Markers […]