


Sweet Pea is 5 years old.

From: Many people have asked me if my original Marbled Easter Eggs are edible. I always respond by saying that I don’t recommend eating them. Since the egg shells are porous enough for dye to leak through and stain the egg whites, I imagine that the shaving cream seeps into them too.
However, a few months ago, someone named Vicki left me a comment suggesting that I should try cool whip instead of shaving cream. What a brilliant idea! I experimented a little bit and finally have a method for creating marbled eggs that can be eaten (after peeling them, of course)!
Material:
- Hard-Boiled Eggs
- White vinegar.
- Cool whip.
- Large moderately shallow container. (I used GladWare, but I think a plastic or foil 8×8 disposable baking pan would be perfect. Larger pans require too much Cool Whip.)
- 2-3 different colors of liquid or gel food coloring. (We used a “neon” color set. Several people have reported that the Wilton brand from a craft store creates deeper colors then regular ones from the grocery store.)
- Chopstick or paint brush end for swirling the colors.
- Large serving spoon.
- Spatula (optional).
- Paper plates.
- Enough space in the refrigerator to store the eggs for several hours.
- Paper towels.
- Smock or bib for your tot.
")
Procedure:
- Add a 2-3 TBS of white vinegar to the eggs, turning them to make sure that all sides get coated.
")
- Scoop enough Cool Whip into the container to coat the bottom by about 2-3 inches. You don’t want it too deep or it will dilute the dye. Smooth down the Cool Whip with a spatula or the serving spoon.
- Put about 10 drops of food coloring onto the Cool Whip. Repeat with 10 more drops of each remaining color.
")
- Let your tot use the end of a paint brush or chopstick to slowly swirl the colors together. (Generally the less swirling the better. If the dye becomes too incorporated into the Cool Whip, it will not be bright enough on the eggs.)
")
- Allow your tot to gently place an egg onto the top of the Cool Whip.
")
- Show your tot how to carefully roll the egg along the top of the Cool Whip with the large spoon until it is entirely coated with dye.
")
- Place the egg on a paper plate and set aside.
- Add a few more drops of food coloring to the Cool Whip and then repeat the procedure with the remaining eggs, adding more food coloring each time.
- Put the eggs in the fridge and allow them to sit undisturbed for about 8-12 hours. (You should not allow the eggs to sit at room temperature if you plan on eating them.) See “Notes from the Trenches” for more details on timing.
")
- After 8-12 hours, remove the eggs from the fridge and gently rub the Cool Whip off of the eggs with a paper towel. This part is very messy and also requires a delicate hand. Rub until the eggs are totally dry and free of Cool Whip, but do not press too hard on the eggs! I pressed too hard and broke a couple of the eggs this way. (Despite Play at Home Mom’s admonishments to say “yes” more often, all I could envision was a head-to-toe stained Sweet Pea, ruined clothing, and an entire dozen dropped and broken eggs. I just couldn’t bring myself to let Sweet Pea do this part, but she probably would have loved it.)
")
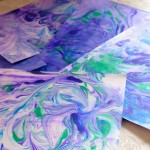
- Display your beautiful marbled eggs. (If you plan to eat them, remember that hard-boiled eggs should not be left out of the refrigerator for more than 2 hours.)
")
Observations: We had a lot of fun with this and we tried it several times to find the best method. We started out using tongs to turn the eggs, but that didn’t work nearly as well as a large serving spoon.
")
As I mentioned, this is very messy, but it was a lot of fun With modifications, I think it could be enjoyed by all ages. I recommend it for anyone looking for a new twist on the normal Easter Egg dying tradition.
")
Notes from the Trenches: We found that the green food coloring didn’t show up very well, but that might have been because we always added it after we’d already done several eggs with other colors first.
8-12 hours is the optimal amount of time to leave the eggs covered in the Cool Whip and dye. As you can see in the picture below, if you don’t leave the dye on the eggs for long enough, it doesn’t set.
")
Alternatively, if you leave the Cool Whip on the eggs for too long, it dries and becomes very difficult to remove. Note the gummy stain on the egg shown below.
")
The only way that I could get the dried Cool Whip off of the egg was to rub it with a damp cloth. However, this caused much of the dye to come off in those spots.
")
Along the same lines, please be aware that these eggs are not colorfast. Every time I handled the eggs, some (not a lot, but a bit) of food coloring would stain my finger tips if they were the slightest bit damp. I can imagine that taking the eggs from the fridge and leaving them out would cause some condensation and make the situation worse. I’ve had this happen with regular store-bought Paas egg dye kits too, but thought I should mention it. Be careful if you intend to hide these eggs because I definitely think they would stain fabric.
(04/01/15 Update: Some people have suggested rubbing a drop of vegetable oil onto the egg to set the dye. Someone else suggested re-dipping the eggs in vinegar. If anyone tries these things, please let me know and I will update the blog to reflect your suggestions. Thanks!)
Rating: 2 Stars * (Fun, Easy)
Carnivals: This post is linked up to It’s Playtime! @ Kid’s Activities Blog.


 "Pin It")

 "Pin It")


I want to try this on wooden eggs….but will just wiping the eggs off (without rinsing them) leave them sticky? Also, since cool whip is a refrigerated food item, will the eggs stink after awhile? Since I’m using wooden eggs, my intention is to keep them.
Eggs should not be left out of the fridge for more than 2 hours. If you leave the cool whip dye mixture on too long, the eggs can be sticky. Please read my “Notes from the Trenches” section for more details. Hope that helps!
Will this stain hands?
Yes, it did for us! But it probably depends on the type of dye you use.
i HAVE DID SHAVING CREAM ON WOOD PICTURE FRAMES TURNED OUT GOOD
I just did these with my dayhome toddlers and they are a beautiful subtle tye dye after an hour – leaving some on longer… We did blown eggs and I put them in a vinegar dip for about 15 min prior to dying. The best part was being able to lick our fingers/hands after haha. Thanks for this EDIBLE version of egg dying 🙂
Do you dry off the vinegar before putting them in the cool whip?
I do know if it matters. I did not dry the eggs off, but I did hold them up and shake them a little bit so they were not sopping wet.
I put my cool whip in a cookie sheet with a small edge put plastic gloves on the kiddos and rolled the eggs just enough to cover. Looks great we used 4 colors.
The plastic gloves are such a good idea!!!
How long would these keep for? Doing an event on the 13th wanting to know how early I can do these
Hard boiled eggs can be kept about 5-7 days in the fridge. (https://www.incredibleegg.org/cooking-school/tips-tricks/egg-storage/) Make sure you follow good food safety and don’t leave them out of the fridge for more than a couple of hours.
For a more long-term solution, you could use wooden eggs.
I wonder if you used whipping cream or the powdered kind that you actually whip how it would do. Cool whip is pretty dense whereas the other kinds are more airy. Just a thought.
[…] Cool Whip (Green & Yellow) […]
[…] –Marbled Eggs (Whipped Cream) […]
[…] I searched Pinterest and came across this idea of using Cool Whip and Food Coloring to dye my Eater Eggs thanks to Tot School. […]
[…] Use the previous technique with the shaving cream to marble and dye your own eggs! http://totschool.shannons.org/edible-marbled-easter-eggs […]
[…] nekad iepriekš ne redzējusi, ne dzirdējusi, ne iedomājusies. Varbūt interesanti būs arī Tev! Re, pievienoju linku uz skaidri saprotamu pamācību angļu valodā. Manuprāt, ļoti interesanti un tiešām feini. […]
[…] could just buy an egg dying kit, or get extra creative and try this marble egg activity I found at Tot School. You soak the eggs in vinegar, marble the food coloring with whipped cream, then swirl your eggs. […]
[…] Cool Whip Decorated Easter Eggs from Tot School […]
[…] shaving cream or Cool Whip with a few drops of color swirled throughout offers an interesting, albeit messier, alternative to […]