From: I was looking for some activities for Sweet Pea’s classroom Halloween party and got the idea for a game of Halloween themed charades from EasyPartyIdeasAndGames.com. Since we were going to be playing with beginning readers (1st, 2nd and 3rd graders), I wanted to make Halloween word cards that included pictures.
Material:
Timer (I just use the timer on my iPhone).
Scissors (or make your life easier and use a paper cutter).
Print the Halloween Picture Cards and laminate if desired.
Cut the pages into cards.
Decide if you will be playing with teams (more competitive) or as a big group (more laid back).
One Group Rules (without keeping score)
Pick a person to keep track of time.
Pick a player to start. Without looking that player selects a card.
The timer should start the timer for 2 minutes.
The player stands in front of the group and tries to act out the word on the card without making any noise.
The rest of the group tries to guess what word was on the card.
The first person who correctly guesses the word becomes the next player.
If time runs out without anyone guessing, they reveal the answer and randomly select another person to be the next player.
Team Rules (with scoring)
Split the group evenly into two teams.
One person from the first team selects a card and tries to act out the word or phrase without making any noise.
The rest of the players on the first team remain quiet while all the players on the second team try to guess the answer.
If someone from the second team guesses correctly before time runs out, then that team gets a point. If no one guesses, then the correct answer is revealed and no one gets a point.
It is now someone on the second teams turn to select a card and act it out while the first team tries to guess.
Repeat until everyone has had a chance to act out a card and the teams have had an even number of turns.
The team with the most points wins.
Observations: I figured other people might want to use the cards so I am publishing this before we actually play charades. We will be playing with the non-competitive “one group rules”.
Related Posts:
The tiny little elves that live inside my computer think you also might be interested in the following:
Paintbrushes. (These Crayola ones are my favorite paint brushes for kids.)
Salt in a very small cup or bowl.
Plastic tablecloth or other covering for your work area. (optional)
Smock or bib for your tot. (optional)
Procedure:
For the most eye-pleasing results only set out 3-4 colors of watercolor paints. (See Notes From the Trenches #1)
Give your tot a piece of paper and invite him to paint all over the paper. Encourage him to cover all of the white space.
Meanwhile, take a piece of paper for yourself and paint all over the paper. (See Notes from the Trenches #2)
After you are done painting, but while the paint is still wet on your paper, demonstrate taking a small bit of salt between your fingers and sprinkling it over the wet paint. The salt will cause an interesting pattern to appear in the paint. Repeat a few times until you are happy with the effect.
Give your tot a small amount of salt and allow him to sprinkle it over his own paper.
Set the artwork aside in an out of the way location until it is dry.
Once dry, brush any extra salt off the paper into the sink and enjoy your paintings.
Observations: After doing a couple of pictures my way, Sweet Pea decided she wanted flick her paintbrush to create splatters on her paper. This resulted in a way more messy activity than I had originally anticipated.
Sweet Pea loves art projects and this was no exception. We both had lots of fun and I would recommend it for tots (and adults) of all ages. 🙂
Notes from the Trenches
If you let your tot use all possible colors, they merge together and create an unpleasant muddy brown for the finished product. I often let Sweet Pea use as many colors as she wants, but if we are making a gift or a special project, I usually limit her to 3. She never seems to notice one way or the other.
I once read an excellent article about doing art activities with children, which stressed that an adult shouldn’t draw on or their child’s paper. I took a moment to think about how startling it might be if I showed someone a painting and they reached over and added their own marks to it and since then have always tried to demonstrate on my own paper instead of drawing on Sweet Pea’s work.
From: I found instructions for this fun and frugal activity from Julie Finn at Crafting a Green World.
Material:
Several old dried-out markers in a variety of colors.
Pliers.
A few small glass or plastic jars with lids. (Julie suggests using old spice jars, but I had some perfect little plastic jars I had bought on clearance in the paint section at Hobby Lobby.)
3 Paper plates or pieces of paper.
Tweezers. (optional)
Plastic covering for your work area. (Optional, but recommended.)
Bib or smock for your Tot. (Optional, but recommended.)
Procedure:
Let your tot draw on paper to discover which of your your old markers have dried out.
Return the still good markers to your art supplies and make a pile of the dried out ones.
Invite your tot to separate the markers into a few piles by colors. You will need a color pile for each jar of paint that you wish to make.
Allow your tot to choose a pile of markers to work with first.
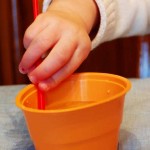
Working with one marker at a time, use the pliers to crush the back end of the marker until the plastic cracks. (This job should only be done by an adult. Please read my Notes from the Trenches below.)
After the tube has cracked, use the pliers to pull the little plug out of the tube and throw it away.
Show your tot how to lightly bang the tube on a piece of paper or a paper plate so that the marker ink well falls out of the barrel.
Invite your tot to drop the ink well into the empty jar.
Use the pliers to remove the nib and throw it away. Set the barrel and cap aside.
Repeat with all of the remaining markers in the first color pile, adding each of the ink wells to the jar.
Allow your tot to fill the container about 3/4 of the way full with water.
Put the lid on the jar if possible. However, if your ink wells are too large, you may have to leave one end sticking up out of the water. Place the jar in an out of the way location. It is especially important to make sure that the jar is unreachable to small children or pets if you can not put the lid on it.
Repeat the process with the remaining piles of markers until all of the jars are filled.
If possible, recycle the marker caps and barrels. (Crayola is oddly cagey about revealing the type of plastic used to make the barrels, but Julie says that it is #5.)
Allow the jars to sit for at least 24 hours. (We let ours sit for a couple of days.)
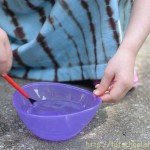
After most of the ink has leaked out of the ink wells, invite your tot to use the tweezers to remove each of the ink wells from the paint jars.
Allow your tot to squeeze each of the ink wells into the paint jars to extract the last bits of ink from them.
Repeat for each of the jars and Voila! You have made your own watercolors!
Observations: Sweet Pea had tons of fun with this, even though there wasn’t a whole lot to it.
She had trouble waiting for the ink wells to finish soaking into the water and wanted to check on them often. We were surprised by the final color of the watercolors. Our “green” pile turned into an almost black color of paint.
When it was finally time to finish the activity, she especially loved squeezing the last bit of ink out of the wells.
The watercolors we created were light when painted on paper, but very usable. I’ll post an activity that involves painting with these watercolors in a couple of weeks.
This activity is probably best suited for mature kindergartners and elementary school children. Younger kids could help sort markers, but I probably wouldn’t want to turn them loose with the messy ink wells.
Notes from the Trenches: One of the marker’s exploded when I crushed it with the pliers. Pieces of plastic flew everywhere. If I had lawyers, they would probably require that I tell you to wear safety goggles during this portion of the activity, and to keep your child out of the room. Someone else suggested using a PVC cutter, and I think that might have worked better.
Clearly, this is messy work.
We only dissembled Crayola markers, but I assume that other brands would work just as well.
Prerequisite: This purpose of this activity is to help with the memorization of addition facts. Your child should already be very familiar with the concept of addition and be able to write all of the numerals from zero to nine.
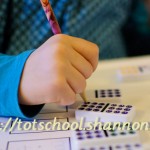
From: The addition working chart or finger chart is a commonly used Montessori material. It is usually made from a solid piece of wood, but I created a paper version and laminated it.
Create a booklet from your selected addition worksheets, by cutting them into pages and stapling them together.
Sit next to your child with the booklet and an addition figure chart in front of you.
Point to the first problem on the addition worksheet and say the problem out loud (“7 plus 8”).
Using the addition finger chart ,with your right hand move your pointer finger along the top blue line until you come to the first number in the problem, saying the number out loud (“7”).
Keeping your right hand in place, slide your left pointer figure down the red line until you come to the second number in the problem, saying that number out loud (“8”).
Slide your right index finger down the row, and your left index finger across the row until they meet in the square that contains the answer to the problem.
Say this number out loud (“15”)
Moving back to the addition booklet, say the entire equation out loud and have your child to write the answer in her booklet.
Invite your tot to do the next problem on her own, guiding her as needed.
Allow your child to continue working for as long as she is interested.
Observations: Sweet Pea usually prefer art and science activities, but she does like to use the finger chart. I like this activity because it allows a child to create a piece of work without being too pushy about forcing them to learn the addition facts. The memorization develops as a natural consequence of creating the booklets. It is just easier to “learn” the facts than look up each one.
This is a super activity for helping kids memorize their addition facts, which I admit, can be a little tedious. Sweet Pea really enjoyed having her own little booklets and was very motivated to complete them. I would recommend it for advanced kindergartners or early elementary aged children.
Notes from the Trenches: As I mentioned, earlier this activity is only for children who already understand addition, but who need some interesting work to encourage memorization.
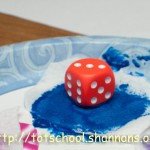
From: Many people have blogged about Cloud Dough, but I first read about it at Tinkerlab. Cloud Dough is a mixture of flour and oil that creates a really interesting substance. It is somewhat powdery, but easily clumps together when pressed. It is like wet sand, but with a silky texture.
Material:
Plastic tub or large other container. (We used a disposable aluminum pan.)
8 Cups Flour.
1 Cup Vegetable Oil.
Measuring cups and spoons for playing (optional).
Procedure:
Help your tot add the flour to the tub.
Pour the oil over the flour.
Invite your tot mix the flour and oil together until the mixture reaches a smooth, yet crumbly consistency.
Let your tot play.
Observations: Cloud Dough is very fun! Sweet Pea had a blast just packing it into the cups and running her hands through it.
One of the little neighbor girls saw us playing and came over. The girls played together for over an hour pretending that they were running a bakery. After her friend left, Sweet Pea and I probably played for another hour. She could not get enough of this stuff.
Children of all ages would enjoy cloud dough and if you use an edible oil (such as vegetable oil) it is a very toddler friendly activity. The only drawback is that it is very messy.
Sweet Pea did not want to quit playing. 🙂 We did not store ours because it had gotten too much dirt and grime in it, but I read that it will keep for at least a month.
Notes from the Trenches: Did I mention the mess? This is probably the messiest activity we have ever done. I had read reports of it creating slippery floors inside, so we just did the whole thing outside and that is the only way I would recommend this activity. I just sprayed the hose on the spilled cloud dough and rinsed it off the driveway. If we had been inside, I don’t know how I would have gotten everything cleaned up.
Rating: 3 1/2 Stars * (Fun, Easy- to set up, but maybe not to clean up, Independent, Frugal)
Related Posts:
The tiny little elves that live inside my computer think you also might be interested in the following:
From: I got a pack of washi tape on Black Friday last year as a door-buster at a craft store. I didn’t have any idea what to do with it until I saw this cute idea for washi covered pencils at Punk Projects. I modified her method so it is easier for children and also to allow the tape to be more easily peeled away when it is time to sharpen the pencil.
Material:
Pencils.
Washi Tape. (I don’t know what brand I used, but my local Target was selling rolls of Scotch Expressions for about $3 each in the school supply section this year. You can also find it at Office Max.)
Scissors.
Ruler.
Procedure:
Invite your child to sharpen the pencil.
Show your tot how to measure and cut off about 12-inches of washi tape.
Stick the 12-inch long strip of washi tape to the edge of the table and cut a off a 1 inch piece.
Test to see if the 1-inch strip will go all the way around your pencil. Exactly 1-inch pieces worked perfectly for us, but you may need a different size depending on the diameter of your pencils.
Show your tot how to measure and cut off a 1-inch (or larger, if applicable) piece of washi tape.
After the first piece of tape has been measured and cut, your tot can use it as a guide to cut the rest of the pieces of tape.
Once your tot has cut 10-12 peices of tape, show him how to start wrapping the first piece of tape around the pencil next to metal band near the eraser. It will requires some concentration to keep the edge of the tape even with metal band.
Invite him to wrap the next piece of tape around the pencil, next to the first. Repeat with the remaining tape strips until he gets to the edge of the pencil next to the sharpened end.
Enjoy your new beautifully decorated pencils. 🙂
Before sharpening the pencil, just peel off the topmost strip of tape. Make sure to show your child how to do this before you send him to school with the new pencils.
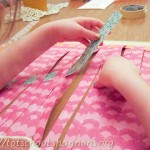
Observations: Sweet Pea is headed to 1st grade this year and got to buy school supplies for the very first time. She was super excited when I suggested decorating the plain pencils that we had purchased.
This was a neat little craft and I loved how I was able to work in some math with the use of the ruler.
Sweet Pea really liked having the decorated pencils, but she was only interested in doing about 3 of them before she got bored. This wasn’t as engaging as a lot of our other art projects. Partly, I think she was a tiny bit too young for this. It was hard for her to cut and wrap all of the tape. I suspect that it would be much easier and more enjoyable for older kids, so I’m limiting my recommendation to elementary school aged children and up.
Notes from the Trenches: Can you sharpen the washi tape covered pencils? It worked okay in our sharper, but I found that it left the tape a little ragged, so I wouldn’t really recommend it. It probably wouldn’t hurt anything though.
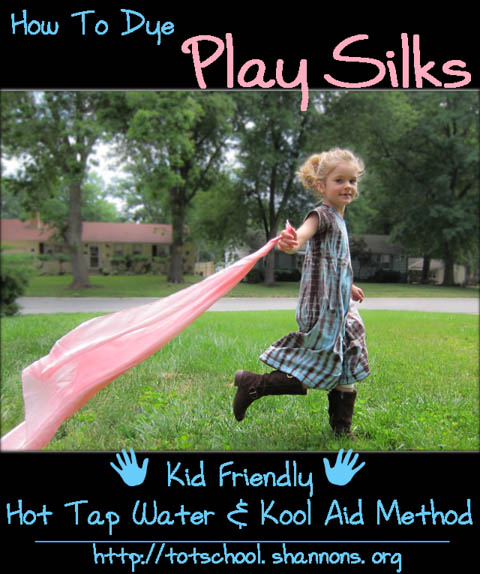
From: Play Silks are a type of beautiful toy commonly used in Waldorf education. You can buy them pre-dyed, but at almost $15 each, it is very expensive to get more than a few colors. There are a zillion blog posts about how to dye play silks, but I found this awesome and mostly child friendly method at Rachael Rabbit.
Material:
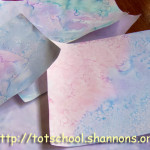
3 packets of Kool-Aid (We used Pink Lemonade to make the pink play silk in the picture above.)
Undyed Silks (I bought 35 x35 inch silks from Dharma Trading Company, which are about $5 each depending on how many you buy. Smaller ones are much cheaper, but I think the larger ones are best.)
Large Bowl
Measuring cup.
Tongs
Hot tap water
Vinegar.
Microwave.
Pot Holders.
Washing machine, dryer and an iron. (Optional)
Bib or Smock for your tot.
Procedure:
If your tot is helping you dye the silk, you should either go outside or make sure that anything near your work area is covered. Remember that the point of this activity is to DYE something. Anything that comes in contact with the Kool-Aid will be DYED cherry red or berry blue or slammin’ strawberry, etc…
Unfold the silk.
Add about 2.5 cups of water and 1/4 cup of vinegar to the large bowl. Add the silk and let your tot stir it around a little bit with the tongs.
Pour the vinegar water mixture down the sink and wring out the silk.
Add 2 .5 cups of hot tap water, plus 1/4 cup of vinegar to the bowl and then pour in 3 packets of Kool-Aid.
Show your tot how to stir the water very gently until all of the powder has dissolved.
Let your tot gently lower the silk into the colored water.
Pick up the silk a couple of times and rearrange it so that all parts get evenly covered by the dye.
Demonstrate how to slowly stir the silk around in the water with the tongs. You may need to turn the silk over to make sure all parts spend an equal amount of time in the dye.
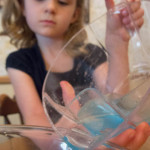
Let your tot continue stirring the silk for a few minutes until most of the dye has been sucked up out of the water. (See how all of the red color has been removed from the water in the picture below? I was fascinated by how the dye leaves the water and gets absorbed into the silk!)
This next part should be done by an adult because the bowl & water can get very hot: Microwave the play silk for 2 minutes, stir and then let rest for 2 minutes. Repeat by microwaving for another 2 minutes, stirring and then letting the silk rest again for 2 more minutes. After the play silk has rested the second time, use pot holders to carefully carry the hot bowl to the sink and start running cold water into it.
Rinse the silk for a couple of minutes under cold water, let your tot move it around until the water runs mostly clear.
Wring the water out of the playsilk.
Wash on the delicate cycle in your washing machine and then dry on hot.
If you want perfection, iron the silk until it is smooth.
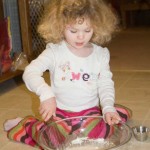
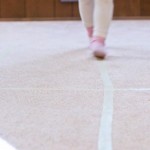
Observations: Dyeing the silks was interesting, but Sweet Pea enjoyed playing with them even more. She couldn’t wait for the first silk to finish drying, and was so excited to finally be able to play with it. She loved dancing with it, twirling and throwing it in the air.
The play silks have been a big hit in the dress up department as well. 🙂
If you are outside and don’t care about the mess, then dyeing the Play Silks would probably work for preschoolers and up. Inside the house, I would only do this with an older child. However, even if the entire dyeing process is done by an adult, these play silks are wonderful toys and would make a fantastic homemade gift.
Notes from the Trenches:
We encountered a small problem with our first play silk because I was unprepared for how fast the dye would get absorbed by the silk. I just dropped the silk into the dye and let Sweet Pea stir it for a couple of minutes. Unfortunately the center ended up being quite a bit paler and slight mottled because the fabric was wadded up and not exposed to as much dye. I should have lifted the whole thing out of the dye a few times and moved it around before letting Sweet Pea stir it.
If you want to get creative, see this chart for guidance about which colors can be created by combining different flavors.
Do not wash multiple colors of play silks together in the washing machine. I have read that the colors will bleed onto each other.
Pouring the dye water (or even worse, allowing your tot to pour it) over the silk will result in a gigantic mess when the dyes-everything-it-touches-liquid comes sloshing over the side. Pour the Kool-Aid powder into the vinegar water first, stir gently, and then carefully add the silk.
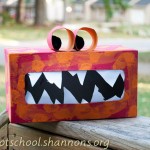
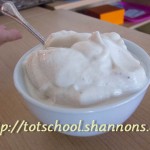
From: I often freeze those tubes of yogurt for Sweet Pea. One day, when she asked me to make them, we were out of tubes, but had some yogurt cups, so I offered to try to make popsicles out of those instead and they turned out great!
Material:
Popsicle Sticks (You can get them from Amazon, but we just bought ours at Micheal’s craft store).
Yogurt in small tubs
Sharp Knife
Medium sized mixing bowl
Very warm tap water.
Procedure:
Wash and dry the popsicle craft sticks if you are overly concerned about them being dirty.
Use the knife to cut a small slit in the center of the yogurt top. Do not make it too large or your popsicle stick will fall over sideways!
Stick the popsicle sticks through the cut slit so they stand upright.
Place the popsicles in the freezer for at of hours
After the yogurt is completly frozen, remove the lid without disturbing the Popsicle stick by using a knife to slice the lid in half before peeling it off.
Fill the bowl full of very warm tap water. Hold the yogurt container by the top while you hold the bottom in the warm water for 5-10 seconds.
Pull gently on the popsicle stick. If the popsicle is still stuck, return the container to the water for another 5-10 seconds. Repeat until the popsicle easily releases from the container.
Hand the popsicle over to your tot!
Observations: Sweet Pea loved eating these. Although I suspect that a child more used to traditional Popsicle might not find them sweet enough.
These were super fun and easy to make. They are a perfect snack on a hot summer day.
It was tricky to poke the knife tip through the lid and cut a small enough slit to get the popsicle stick to stand up. Elementary aged children could probably do this entire activity by themselves, but Sweet Pea was still a little too young. Despite the fact that I did all of the preparation, she was still very excited about it and loved watching the process so I will go ahead and recommend this for all ages, even though younger tots will be doing more observing until it comes to the eating portion of the activity.
Notes from the Trenches: As I mentioned, it is a little tricky to cut the lid of the yogurt container so I did that myself. The only other problem I had was getting the popsicle out of the container, which I solved by briefly holding it in warm water.
Sweet Pea was about 4 years old when she was introduced to this work.
From: The Movable Alphabet is a set of letters that allow children to build words before they have started either writing or reading. It is a very classic and well-known piece of Montessori work.
Prerequisite: You and your child should know the phonetic sound that each letter makes. The traditional Montessori method for teaching this is by using sandpaper letters (Living Montessori Now has a great article about using sandpaper letters here) and after that, the I-Spy game is a great activity. However, we had the most success with the Leap Frog: Letter Factory dvd. Sweet Pea knew all of her letter sounds after watching it only a couple of times. I can not recommend this dvd highly enough!
If you are using my Printable Movable Alphabet, print it out. Laminate the sheets if desired first, and then cut out the letters. Sort the movable alphabet letters and place them in alphabetical order in egg cartons or a compartmentalized craft box.
Procedure:
Select a set of 10 picture cards to use.
Roll the towel or rug out on the floor if you are using it or allow your child to do it.
Look through the picture cards with your child and verify that he can correctly name each of them. (Make sure that he knows that the “log” is a log and not “wood” for example.)
Select one of the picture cards and place it on the left side of the rug. Say the name of the picture. (“This is a dog.”)
Help your child sound out the first letter of the word. Say the word very slowly and exaggerate the sound of the first letter (“What is the first sound you hear in the word, Duh-ahh-guh?”)
When your child identifies the sound, ask him to find the letter it represents from the alphabet, remembering to call it by its phonetic sound instead of it’s real name. (“Great, can you find the letter, Duh”?)
Have your tot place the letter next to the picture.
Next ask your child to identify the next letter in the word, select it and place it correctly next to the first letter. (“What is the middle sound in the word, duh-Ahh-guh? Can you find the “Ahh”? Put it here next to the Duh.)
Finally, help your tot identify the last letter, select it and place it at the end of the word. (“And what is the very last sound in duh-ahh–Guh? Now, find the “Guh” and place it next to the “Ahh”.)
After the first word is completed, let your tot select a new card and help him build the word for it.
Repeat until your child has finished building all of the words in the first set of picture cards.
As your child gets more comfortable with this lesson, he should be able to start sounding out words with much less help from you.
Observations: Sweet Pea has always been fascinated by letters and words, so word building is an especially appealing activity for her.
Below is a video of Sweet Pea using the movable alphabet to spell the word “dog”. She was already quite familiar with the movable alphabet and the word, “dog”, so she did not need much help.
This is a really great activity for all young children since it lets them create words before they have the dexterity to write or the mental ability to “decode” words by reading them. It would be especially good for a home-schooled preschooler or kindergartner or any young child who is showing a lot of fascination with words and letter sounds.
Notes from the Trenches: Do not correct spelling mistakes. You do not want to discourage your child, so if he is trying to build the word cat and suggests “k-a-t” or even “k-e-d”, that is okay for now. Don’t comment on it, but just realize that your child needs more work in discriminating those letter sounds. Go back and work with them on learning those sounds with other activities. (Sandpaper letters, Leapfrog Letter Factory dvd, I-Spy Game, etc)
Also, note that since this activity is usually introduced prior to any reading instruction, you are not supposed to ask your child to read the words back to you.
To start, you can print and cut out the printable movable alphabet, but if you plan on doing much Montessori work, I suggest getting a wooden set. I tried printing and laminating paper letters, using chip board and even foam letters, but none of them worked quite as well as the wooden set. The paper letters were just not as engaging for Sweet Pea and we had trouble keeping the letters neat and separate in the plastic craft box. Eventually I just went ahead and bought a small wooden set and I’m very glad I did. I like that the small set doesn’t take up a lot of space, although the letters feel a bit fragile. If your child is rough on toys or if you plan to use the set with several children, you might want to consider buying the larger sized letters.
1/4-1/2 cup Liquid dish or hand soap. (We used Dawn.)
Dry cloth and a damp sponge for clean up.
Procedure:
Put 1 cup cornstarch into the mixing bowl.
Add 1/4 cup liquid dish soap.
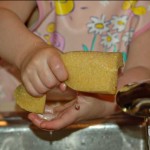
Let your tot mush the cornstarch and soap together until they are combined into a smooth dough like texture. (It starts very messy, but gets better!)
If your dough is still crumbly, add more liquid dish soap about 1 TBS at a time until it comes together. If it is still sticky, sprinkle in some extra corn starch.
Let your tot play!
Make sure your tot washes their hands afterwards since they will have a soap film on them.
To clean up – Try to roll the dough back together to collect every stray piece of dough and then wipe the table down with a dry cloth first!
Hand your tot a damp sponge and let them scrub the table clean. It’s a fun activity and a chore combined. Win! Win!
Observations: This dough was amazing. It was a huge winner.
Sweet Pea loved it! She loved squishing the dough. Shaping it. Rolling it. Everything!
I even loved playing with it. It is somewhat similar to ooblek (cornstarch and water), but with a much sturdier texture. You can make shapes out of it which then very slowly melt.
You can even “break” it.
After we were done, I stored the rest in an airtight container and it has kept without spoiling for about a month, although it has become much drier. It isn’t so good for playing with anymore, but sometimes, I let Sweet Pea pinch off a little bit of the dough and use it to wash her hands.
This was one of the best “dough” mixtures we have ever used. It has a great texture and is only a little bit messy. Huge props to Creative Playhouse for discovering it! I highly recommend it for all ages. If your tot is too little to keep her hands out of her eyes, you could probably use a No Tears shampoo instead of the dish soap.
It just occurred to me that I should try to mix the remains of our DIY liquid snot-soap with cornstarch and see what happens. Off I go to experiment!
Notes from the Trenches:
Adding water to the dough will create a gloopy mess. And again, avoid getting any of it in the eyes since the soap will sting.
I really want to call this material “clean clay” instead of “bubble dough” since it is essentially just malleable soap, but since Kat over at Creative Playhouse came up with the recipe, I figure that she should get to name it.
Do you need some inspiration for activities to do with your own tots? You are in the right place!
You can search by age or activity type using the menus at the top of the page, use the tags on the left, or just check out some of my most popular posts, listed below.
Also, you are encouraged to pin any of my photos to pinterest so long as you include a link back to my blog.


")

")
")
")
")
")
")
")
")
")


")
")
")
")
")
")


")
")


 "Pin It")

 "Pin It")

