|
|

Sweet Pea was 4 years old.
")
From: I found this quick Do-A-Dot letter recognition idea at Tons of Fun and also at A Mommy’s Adventures.
Material:
Procedure:
- Using the first worksheet, explain to your tot that it is a letter maze.
- Use the Do-A-Dot marker to make a dot on the first letter (in the circle) and then ask your tot to find another “A” directly adjacent to the first one.
- When your tot points out the next “A”, make a dot over it.
- Again, ask your tot to point to the next “A” and when he does, hand him the Do-A-Dot marker to put a dot over it.
- Explain that your tot is supposed to keep finding the next “A” until he gets to the last circle.
- Let your tot try on his own, helping if needed.
Observations: When I first saw this activity, I only printed out a couple of the letter mazes for Sweet Pea, but was surprised by how much Sweet Pea took to them. In fact, she insisted that I print out the rest of the letter mazes right away.
")
Sweat Pea recognizes all her upper case letter and is only a bit shaky on a few of the trickier lower case letters (i l and j) so I thought these worksheets would be too easy for her, but she loved them.
")
I would highly recommend this activity for any other tots who have just learned or are still working on their letters.
Notes from the Trenches: Unfortunately, there is no way to erase these Do-A-Dot markers. Sweet Pea accidentally stamped the wrong letter on one of the worksheets and I thought there were going to be tears. I only avoided a meltdown by printing a new worksheet.
")
Rating: 3 Stars * (Fun, Easy, Independent)

Sweet Pea was 4 years old.

From: Lid spin-art has been all over the blogosphere lately (putti prapancha, Let Kid’s Create and Teach Preschool) so when I saw these No Mess Leaves (from Moments of Mommyhood), I immediately wanted to put my own “spin” on them. 🙂
Material:
- Several colors of kid’s craft paint. (We stuck to Fall leaf colors like orange, brown and red.)
- Paper.
- Plastic Lid.
- Leaf outlines. (This is a .pdf file and requirse Foxit or Adobe Acrobat to view it.)
- Scissors. (Maped Koopy Spring Scissors are my favorite type of scissors for tots.)
- Double-sided tape. (Or make loops out of regular tape.)

Procedure:

- Draw a circular outline around the lid on a piece of paper.

- Show your tot how to drizzle a small amount of paint (about 1/2 tsp per color) inside the circle and then press the lid gently on top of the paint.

- Demonstrate using your hand to twist the lid until all of the white space has been covered with paint.
- Lift the lid to see your spin art.

- Let your tot create several pieces of spin art and then allow them to dry overnight.
- Cut out each of the spin art circles or allow your tot to cut them out.

- Tape one of the leaf outlines to the back of a spin art circle in 3 or 4 spots so it is securely fastened. In the picture below the painted spin art side of the paper is facing down, while the leaf outline is up.

- Depending on your tot’s skill level, either cut out the leaf yourself or allow your tot to do it.

- Being careful not to tear your leaf, remove the tape and leaf outline from the back.
- Repeat with the rest of your leaves and enjoy!

Observations:
Holy Moley! Are these cool or what? I was excited as soon as I saw our spin art because I could see it was going to make very realistic looking leaves. See how the different colors of paint ran into lines as the lid was pulled away from the paper? This technique created awesome faux “veins” in the leaves.

Both Sweet Pea and I were very entertained by the spin-art. We went through the entire stack of paper (15 sheets?) that I had set aside for this activity. Every single time, Sweet Pea was excited to pull up the lid and see what the paint looked like underneath.

This was so much fun, even if you only do the spin-art portion and never get around to cutting out the leaves. I think this activity would work for a wide range of ages and I highly recommend it.
Notes from the Trenches: We also tried painting directly on the lid instead of drizzling the paint on the paper, but it didn’t work as well. Sweet Pea just couldn’t get enough paint on the lid so it didn’t transfer to the paper.

Detailed leaves can be difficult for a tot to cut out. Let younger tots cut the easier leaves (dogwoods and maples) and save the oak leaves for yourself.

Rating: 3 Stars * (Fun, Easy, Frugal)
Carnivals: Linked up to It’s Playtime @ hands on : as we grow.
Sweet Pea is 4 years old.

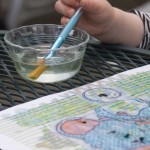
From: I was inspired by this fun watercolor spray paint idea over at Creative Connections for Kids.
Material:
- Food coloring or liquid watercolor.
- Spray bottles. (Teacher Tom recommended the brand from ACE hardware.)
- Paper.
- An old towel.
- Stencils. (You can also make these yourself out of paper or craft foam as like Creative Connections for Kids did.)
- Shallow box or tray. (This is to contain the colored spray. However, we sprayed directly on our driveway and the liquid water colors easily rinsed off.)

Procedure:
- Fill a spray bottle about halfway full with water and add several drops of liquid watercolor until you have achieved the desired color.

- Take your tot, spray bottles, paper, stencils, old towel and shallow box outside.
- Test your spray bottles to make sure they are set to spray in a fine mist (as opposed to a straight stream).
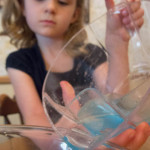
- Show your tot how to place a stencil on top of a piece of paper and then spray the colored water at it from about 12 inches away.
- Demonstrate using the old towel to lightly blot the top of the stencil. This prevents the colored water from dripping onto the picture and ruining it when you pick up the stencil.

- Remove the stencil and reveal the picture beneath.

- Let your tot try the next picture, helping as needed.
- For a variation on this activity, spray the paper entirely with one color before adding the stencil and spraying with another color. See the creepy octopus below? I think this would be a good method to make ghost decorations for Halloween.

- For even cooler pictures, you can repeat again with new stencils and new colors on the same sheet of paper.

Observations: Sweet Pea had lots of fun with this activity and I would consider it a huge success. Sweet Pea enjoyed trying every combination of stencil and color possible.

We discovered that the trigger on the spray bottle needs to be pulled quickly or else the colored water “dribbled” instead of spraying out. It took Sweet Pea several tries before she was able to pull the trigger quickly enough for the desired effect.

This is a really fun activity, but because of the strength required to use the squirt bottle, I would only recommend it for preschoolers (and up).
Notes from the Trenches: We bought a pack of stencils for only $1 from Micheal’s, but they were made out of glossy card stock and did not hold up well when sprayed with water. I will probably order a plastic stencil sets from Oriental Trading Company for next time.
When we started this, Sweet Pea sprayed the water bottle with the nozzle directly above the paper. This caused a big puddle of colored water that just ran under the stencil Your results will be much better if you can keep the nozzle of your tot’s squirt bottle at least 12 inches away when spraying. Good luck with that. 🙂

I liked the color of our pictures when they were wet, but I thought they were too light when they dried. I would probably use a little bit more liquid water color next time.
Rating: 2 Stars * (Fun, Easy)
Carnivals: Linked up to Art for Little Hands: Monday Madness.

Sweet Pea is 4 years old.

From: Sweet Pea loves a good tea party, however, I partly posted about this activity so I could give away a bag of vanilla tea. 🙂
Material:
- A tea set (real, toy or imaginary).

Procedure:
- Help your tot set the table (or floor) for their tea party.
- Invite a few of your tot’s stuffed animals to the party.
- Allow your tot pretend to serve tea and snacks.
- Have fun!
Observations: Sweet Pea loves tea parties and all other types of pretend play. This sort of imaginary play is probably her favorite thing to do right now.

I highly recommend playing make believe with your child, whether it is just having a tea party or pretending to be pirates, princesses, superheros, dinosaurs or whatever else your child is currently in love with. Imaginative play helps your child comprehend the world, learn social skills, build memory, expand his vocabulary and a whole host of other good stuff.
Notes from the Trenches: Full disclosure: Imaginative play is probably the hardest type of play for me to engage in with Sweet Pea. I love doing arts and crafts with her, going to the park, reading aloud and lots of other activities, but pretend play simultaneously makes me anxious (“OMG! I have so much else I should be doing!!”) bored (“How many times in a row can she possibly want to pretend that we are dogs?”) and guilty (“I should be enjoying this because she is only going to be a little girl for such a short period of time.”).
After many episodes of this, I came up with a simple solution. I set a timer. Pretend play used to stretch out in front of me with no end. Now, I tell Sweet Pea that we only have 10 or 20 minutes to play, set a timer, and can actually (mostly) enjoy the time with her. If I start to dwell on the fact that I haven’t started dinner yet, I mentally picture the timer steadily counting down and am able to focus my attention back to Sweet Pea.
Rating: 3 Stars * (Fun, Easy, Frugal)
THE GIVEAWAY:
I drink a lot of tea. I mostly stick with decaf since any caffeine I consume tends to keeps me awake until 3am. I recently ordered some (amazingly delicious) Decaf Comoro Vanilla Tea from Harney & Sons, but they accidentally sent me regular instead of decaf. When I contacted them about an exchange, they very kindly told me they would send me the decaf and to just give the regular away to one of my friends. How lucky for my readers! I thought the bag of regular vanilla tea would make a perfect giveaway for one of you.

How to Enter: Just submit a comment below telling me what your favorite type of tea is.
The Fine Print: This giveaway is for a 1 lb bag of Harney and Sons Vanilla Tea. This is a loose leaf tea, not contained in tea bags. You must leave a valid email when you submit your comment so I can contact you in the event that you win the contest. I am using random.org to select the winning comment number from all of the valid entries. This contest is open to continental U.S. residents only. The deadline for entry is Sunday, October 2, 2011 at 11:59pm Central Standard Time. Winners will be contacted and announced shortly thereafter.
Sweet Pea was 4 years old.

From: One of our friends gave us a set of Brain Quest Cards and Sweet Pea went crazy over the ones that involved story sequencing. Sequencing is a great early literacy activity so I found heavy cardboard sequencing cards on Amazon. I also bought a workbook of cut and paste sequencing, that contains 3, 4 and 5 picture scenes.
Material:
- Sequencing Cards.
- Sharpie.
- Box or basket to contain the cards.
Procedure:
- Group each set of cards by scene and write a letter on the back that uniquely identifies each set. (For example, write an “A” on the back of each of the 3 cards that is about a girl planting a flower, a “B” on the back of each one that is about a boy pouring a glass of milk, etc..)

- Stack your cards and place them in a basket or box. Make sure all of the scenes are out-of-order, but kept together so your tot can easily identify which 3 cards are in a scene.
- Sit near your tot in a location with a lot of space.
- Show your tot how to select all 3 cards that belong to a scene, checking the back of each card to make sure that they have the same letter.
- Look through the 3 (out-of-order) cards and talk out loud about each of them. (i.e. “The girl is looking at a tall flower. The girl is planting a seed. The girl is watering the ground.”)
- Select the card that goes first and place it on the ground. Let your tot hear your thinking process about which card comes first. (“I wonder which card comes first… I guess there can’t be a flower before she plants the seed, so she must plant the seed first.”)
- Repeat for the remaining 2 cards in the scene.

- Let your child help you with the next set of cards.
- When she understands the game, let her try on her own.

Observations: Sweet Pea was very interested in the sequencing cards and completed every scene in the box in one sitting.

I don’t know why Sweet Pea likes sequencing so much, but she had a really good time with it. She only made a few “mistakes”, and I tried not to correct her when I noticed a card that looked wrong, but instead asked her to tell me about the story. Interestingly, her explanation usually made some sense and it was fun to hear her thoughts about the sequence.

The cardboard card set seemed to be exactly the right level of challenge for Sweet Pea. The huge downside for me was that after Sweet Pea sequenced all of the cards, she was not interested in doing them again. The cardboard card set was about $10, and I think that is too expensive for a 1-time activity. I will probably put them away them for a while and bring them out again in several months. Hopefully she will want to do them again then.
If I had a school, a co-op or even a large family, these might be a good investment, but not really for only 1 child. So I have reservations about recommending this set for an individual, but I do think it would be very good for a larger group of preschoolers.
The workbook was only $5, but it is even less reusable than the cardboard one, because it is made of regular paper and each page is designed to be cut apart and then glued back into the correct order. I also thought that some of the sequences were too difficult for Sweet Pea to figure out. However, she loved coloring, cutting and pasting these sequences so I did feel as though I got my moneys worth. An industrious teacher might be able to color, cut and laminate these to make them reusable.
Notes from the Trenches: Regarding the cardboard card set, the first thing I noticed was that Sweet Pea was entirely overwhelmed by the volume of cards in the box. There were far too many cards for Sweet Pea to figure out which cards belonged in each set, so I had to label the backs to make it easier for find corresponding cards for each scene.
Rating: 3 Stars *(Fun, Easy, Independent)
Sweet Pea is 4 years old.

From: This activity was inspired by Deborah’s description of an “oldie but goodie” on her excellent Teach Preschool blog.
Material:
- Paper.
- Jelly roll tray.
- Kid’s craft paint
- Small toy cars.
- Smock or bib for your tot (optional).

Procedure:
- Place a piece of paper on the jelly roll pan.
- Let your tot select 2 colors of paint.
- Pour a line of one color of paint along the side of the paper.
- Pour another line of the different color paint down the opposite side of the paper.

- Show your tot how to run the car through the paint and all over the paper.

- Let your tot continue running the cars over the paper, adding more paint if necessary.

- For better pictures, encourage your tot to drive the car over the entire sheet of paper until it is entirely covered with paint.

- After the entire paper is coated, remove it from the pan and allow it to dry.
- Clean the cars and then repeat with another sheet of paper and different colors of paint.
Observations: This was a huge, huge success. Sweet Pea wanted to “paint” multiple pieces of paper and we played together for about an hour before she was done.

I expected this to be more of an independent activity than it was, but it required a lot paint pouring, hand wiping, car cleaning and playing by me. Sweet Pea had the most fun making up stories about her car, often requiring me to “drive” a new car through the paint to rescue her “stuck” vehicles. We had a blast!

I liked how putting different colors of paint on each side allowed us to talk about color mixing and discuss the new color that was created. Limiting the paint to only 2 colors on each piece of paper helped to maintain a pleasing color scheme. The “paintings” from this activity were surprisingly beautiful. I thought a few of them would make a good grandparent gift and even qualify as displayable “modern art”.

And we had so fun! This activity is highly, highly recommended for all tots.

Notes from the Trenches: We tried having Sweet Pea dip her cars in paint and then roll them on the paper, but that didn’t work nearly as well as just pouring a line of paint on the paper.

Sweet Pea was extremely enthusiastic in her pretend play. She liked crashing the cars into each other and this caused a some paint splatter. I can imagine that a rambunctious child could create a huge mess. I wouldn’t turn my back on this activity for too long.

In fact, one of the cars flew off of the tray so Sweet Pea got in some practical life practice as she cleaned the paint off of the wall.

Rating: 3 Stars * (Fun, Easy, Frugal – if you have a couple of toy cars around the house.)
Carnivals: Linked up to Art for Little Hands: Monday Madness and to It’s Playtime at hands on : as we grow.
Sweet Pea was 46 months old.

From: This activity was inspired by a section on sewing in John Bowman’s book Montessori at Home.
Prerequisite: Your tot should be very good at lacing before you introduce him to sewing.
Material:
- Shelf Liner.
- Embroidery Floss
- Sewing Hoop
- Dull needle. (We found a package of plastic beading needles for kids at Micheal’s, but I can’t find a link.)
- Scissors
- Straight Edge (optional).

Procedure:
- Using the sewing loop as a guide, cut a square of shelf liner so that it is just a bit bigger than the loop.

- Put the square of shelf liner in between the sewing loops and lock them together.

- Use the Sharpie to draw 1 or 2 straight lines on the shelf liner.

- Thread the needle. (Or if you have zen-like patience and your tot has excellent fine motor skills, you can teach your tot how to thread the needle.)

- Pull the thread through the needle so it is even-Steven with the same length of thread on both sides.

- Tie 2 or 3 knots at the end of the the thread (as far from the needle as possible) or teach your tot to tie a knot and then let him tie 2 or 3 knots at the end of the thread to make one large knot.
- Sit next to your tot and emphasize that he will be sewing along the line you have drawn on the shelf liner.
- Show him how to poke the needle through the back of the liner and pull the thread all the way through until the knot catches.
- Show your tot how to find the next hole along the line and poke the needle back through the liner. Pull the thread all the way through.
- Let your tot try sewing along the line, helping as needed.
- Once your tot has mastered sewing a straight line, you can draw other shapes (such as a heart) on another piece of shelf liner for your tot to sew.
Observations: Sweet Pea is very intent on her work when she is sewing. She loves it and feels very proud of her “adult” skill.

Sweet Pea has done this activity many times since I introduced it and is always happy to get to try to “sew” a new shape.
This activity is only recommended for older preschoolers who have very good fine motor control.
Notes from the Trenches: Obviously constant supervision should be given to your sewing preschooler.
The most common mistake that Sweet Pea made was bringing the needle around the side of the sewing loop instead of poking it up through the back, which required quite a of intervention from me.
Rating: 2 Stars *(Fun, Easy)
Hello,
I am currently out of town and unable to post. I thought I would have better access to the internet, but unfortunately do not. I should be able to resume posting next week. See you then!
Thanks,
Shannon
Sweet Pea is 4 years old.
")
From: I was getting ready to show Sweet Pea a sewing activity (which I will post about next time) when she surprised me by saying she knew how to tie a knot. Her preschool teacher had shown her this very simple method and in delightful reversal, Sweet Pea was able to teach it to me.
Material:
- Embroidery thread, yarn or string.
- Dull needle. (Optional. We found a package of plastic beading needles for kids at Micheal’s, but I can’t find a link. You could also use a yarn needle.)
Procedure:
- In Montessori, it is critical for the instructor to learn the material before trying to teach the child. Make sure you understand this method before you show it to your tot.
 |  |  |  |
| 1. Thread the needle. | 2. Hold your hand with your thumb pointing towards your nose. Place the string between your thumb and pointer finger. | 3. Make a loop around your thumb with the thread. | 4. Pull the loop tight. |
 |  |  |  |
| 5. Push the needle (or just the end of the thread) under the loop around your thumb. | 6. Pull the needle all the way through. | 7. Slip the loop off your thumb and you will see a lose knot. | 8. Pull the knot tight. |
- Got it? Practiced it? Then you are ready to show your child how to do it.
- Demonstrate a couple of times and then let your tot try.
")
Observations: It was very fun to get a lesson from Sweet Pea and she _loved_ being the one to teach me something.

It is tricky for little hands to manage two separate pieces of thread when trying to tie a knot so I really like this “around the thumb” method. Many tots would be proud to learn this practical life skill. This activity is recommended for older preschoolers with good fine motor control.
Notes from the Trenches: Obviously needles can be sharp and should only be used with supervision.
Rating: 2 Stars *(Easy, Frugal)
Sweet Pea is 4 years old.

From: Long ago, I saw this post about making shamrock prints from empty toilet paper rolls at Pink and Green Mama and I’ve seen this sort of thing several times since then (circles, hearts, raindrops).
Material:
- Toilet paper rolls.
- Kid’s craft paint.
- A small bowl.
- Paper.
- A jelly roll tray (Optional).
- Smock or Bib (Optional).

Procedure:
- Press the toilet paper rolls into whatever interesting shapes appeal to you or if you are feeling lazy, just use regular circle. (I was aiming for hearts and stars, but Sweet Pea thought the “stars” were butterflies.)

- Pour some craft paint into a small bowl so there is about 1/8 of an inch of paint at the bottom of the bowl. It needs to be just deep enough to cling to the roll, but not so deep as to make a gigantic mess.
- Put the paper, paint and toilet paper rolls in the jelly roll tray and sit near your tot.
- Show your tot how to dip the toilet paper roll into the craft paint and then stamp the roll on the paper.

Observations: Sweet Pea was very curious while I was setting this activity up and then enjoyed stamping the rolls for a little bit, but it didn’t hold her interest for very long.

I thought she would love this, but after 2 pieces of paper, she was done. I squeezed a couple more toilet paper rolls into new shapes and offered other paint colors, but nothing made her want to continue.

I know a lot of other bloggers have reported success with this activity, but it just didn’t work for us. I don’t know if Sweet Pea was just having an off day or if maybe she was a little too old for it. We do a lot of regular painting and I got the impression that she might have just preferred the normal paint brush. This activity was easy to set up though, so it might be worth trying if you have a younger tot.

Notes from the Trenches: This was a little messy, but we didn’t run into any problems. Then again, Sweet Pea probably didn’t do it long enough for any problems to arise.
Rating: 3 Stars *(Easy, Independent, Frugal)
Carnivals: Linked up to It’s Playtime at hands on : as we grow.
|
Need Ideas? Do you need some inspiration for activities to do with your own tots? You are in the right place!
You can search by age or activity type using the menus at the top of the page, use the tags on the left, or just check out some of my most popular posts, listed below.
Also, you are encouraged to pin any of my photos to pinterest so long as you include a link back to my blog.
-Shannon
|


")

")
")
")


")


")


 "Pin It")

 "Pin It")

