|
|

Sweet Pea is 29 months old.

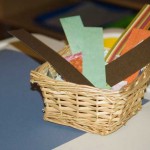
From: I was inspired by this cute felt pizza described on The Adventures of Bear blog. Mine is not nearly as pretty as hers, but it does have the advantage of not requireing a sewing machine. 🙂
Material:
- Several pieces of felt that resemble colors in a pizza (tan, red, cream, white, gray, green, brown, etc).
- Scissors.
- Bowls.
- Large Spoon.
Procedure:
- Cut the largest circle possible out of tan colored felt for the crust.
- Cut a circle out of red felt that is just slightly smaller than the crust for the sauce.
- Cut a slightly smaller circle out of cream colored felt for the cheese.
- Cut a variety of pizza toppings from the remaining colors of felt: Small green squares for green pepper, brown lumps for sausage, thin white strips for onions and gray for mushrooms, etc.
- Put each of the toppings in a separate bowl and set everything out for your tot.
- Tell your tot that you are going to be making a pizza and then help walk them through each of the steps. (i.e. “We’re going to start with the crust….”)
- When you get to the toppings, demonstrate placing them one at a time on the pizza.
- After the pizza has been created, pretend to bake it and/or eat it.
Observations: Sweet Pea loved this, although she had a lot of trouble with the concept of “one at a time” when we were putting on the toppings. At first she liked to just grab a fistful of “onions” and dump them in one small pile on the pizza. It was a good lesson to show her how to separate each item from the bowl and lay it on the pizza.

I loved how she “spread” the tomato sauce on the crust with the back of a spoon.

We both had lots of fun with this activity. At one point Sweet Pea tried roll up the pizza and pretended to eat it like a burrito.

After we had re-assembled the pizza a few times, I suggested that Sweet Pea “bake” it in her oven. She loved doing this too.

I would recommend this activity for other tots. Although it did take some preparation, it wasn’t difficult. It took me about an hour to cut out the circles and toppings, although I’m sure it would have gone faster if I wouldn’t have been watching “So You Think You Can Dance?” at the same time.
Notes from the Trenches: I wish I would have drawn lines to divide the pizza into 6 or 8 slices and then talked about putting 1 of each topping on every slice. It would be a great one-to-one correspondence activity, and I might modify my pizza to do something like that in the future.
Rating: 3 Stars * (Fun, Independent, Frugal if you have the felt, and pretty cheap even if you have to buy it.)

Sweet Pea is 28 months old.

Material:
Procedure:
- The book contains instructions for demonstrating how to fold each of the pages.
Observations: We have had this book for a couple of months and Sweet Pea struggled with it for a long time. She enjoyed the pictures and wanted to fold the pages, but just did not have the finger strength to make a crease. I had to do much of the work. She would take a page and flip it around for a while before eventually holding it out to me and asking, “Mom, help.” She could bend the page, but not actually complete the fold. I would take her fingers and help her press the crease, but she couldn’t do it on her own the first several times we did this activity.

Recently however, Sweet Pea can suddenly make these folds. I am always fascinated by how Sweet Pea can wake up one morning and has suddenly gained a new skill that she couldn’t do at all the day before.

Now that Sweet Pea is more able to do the folding, this has turned into a nice little book to bring with us to a restaurant or anyplace I want her occupied with a quiet activity. It is small enough to fit in my purse and helps keep her entertained while we wait for our food.
Notes from the Trenches: If your tot isn’t ready for it, this book will probably cause some frustration, but overall there weren’t really any problems.
Rating: 3 Stars * (Fun, Easy, Independent – eventually)

Sweet Pea is 28 months old.

From: While Sweet Pea was doing the arranging feathers activity, she wasn’t able to put them exactly where she wanted. The feathers would either fall over in the vase or were too squished together. It occurred to me that pushing the feathers into Styrofoam would allow her to actually arrange them much better.
Material:
Procedure:
- Put several feathers and a piece of Styrofoam on a tray.
- Sit next to your tot and demonstrate picking up a feather. Tightly hold the quill of the feather just below the vane with your thumb and pointer finger. Push quill of the feather into the Styrofoam.
- Repeat the demonstration if necessary and allow your tot to try when they are ready.
Observations: I had to show Sweet Pea how to stick the feather into the Styrofoam several times, but once she got it figured out she was crazy about this activity. I would highly recomend this activity for older tots, but it does require quite a bit of dexterity.

She worked for a long time sticking each of the feathers into the Styrofoam and as usual, did _not_ want any help from me regarding where to put them.
 
Also, as usual, the activity took an unexpected turn. After she had put the feathers into the Styrofoam, Sweet Pea jumped up and put it on the floor. She then started pushing it around and talking about how she had made a boat. I thought it was adorable and she played with her new “boat” for quite a while.

Notes from the Trenches: Showing your tot how to hold the feather correctly is essential because otherwise he or she won’t have the leverage to push the feather into the Styrofoam. Go very slowly when demonstrating how to pick up the feather and push it in. I was sloppy with this the first time, and caused Sweet Pea a lot of frustration. She kept trying to hold the entire feather in her fist and mash it onto the Styrofoam.
Rating: 3 Stars * (Fun, Easy, Independent)
Sweet Pea is 28 months old.

From: I thought this simple feather arranging activity from My Montessori Journey would be fun for Sweet Pea.
Materials:

Procedure:
- Spread several feathers out on a tray and place the vase next to them.
- Sit next to your tot and show them the tray.
- Move your hand slowly over the feathers and then select one as you say something like, “Oh, I think I’d like to use this blue feather.”
- Put your selected feather in the vase and then ask your tot to help you select a different feather.
- Let them pick out a feather and put it in the jar as you discuss it’s characteristics.
- Letting your tot select and arrange feathers until the vase is full.
- Ask them if they want to put the vase on display or if they want to repeat the activity and then proceed accordingly.

Observations: Sweet Pea really enjoyed this. She had never worked with feathers before so they fascinated her. It was especially cute because she kept trying to smell them as though they were flowers.

I tried directing her a little bit to just put feathers of a specific color in the vase, but this did not go over well. She definitely wanted to work without any interference from me.

Notes from the Trenches: Next time I do this, I will use a wider mouthed jar and the marbles as suggested in the post from My Montessori Journey. Sweet Pea liked putting the feathers in the jar, but couldn’t really do as much “arranging” as I would have liked.
Rating: 3 Stars * (Fun, Easy, Independent)
Sweet Pea is 28 months old.

From: The results of this water color resist project at 4 Crazy Kings looked so appealing that I just had to try it.
Material:

- 3 or 4 different colors of non-toxic washable paint. Hide all of the other paint colors you own. (You will thank me for this.)
- Paintbrushes.
- 2 sheets of good paper for painting (plus more to keep your tot happy).
- Exacto Knife or Swivel Style Paper Cutting Tool (or Scissors if you are really good).
- Lightbox or a cutting board.
- Double-stick tape (or make several loops out of regular tape).
- Table cloth, large sheet of paper or other protective cover for your tot’s work area.
Procedure:
- Find a plain background and have your tot stand facing sideways in front of it.
- Take several photos of your tot with a digital camera. Upload them to your computer and select the one that has the best profile.

- Optionally, use a photo-editing program to increase the contrast in your photo so that your tot’s head stands out better against the background. This isn’t critical, but can make the next step easier.
- Chose one of the follow 2 options depending on how savvy you are with photo editing.
- Option 1: Print out your picture to the size you want and use a sharpie to draw a line around your tot’s silhouette.
- Option 2: Use a photo editing or paint program to draw a line around your tot’s silhouette (preferably on a new layer) and print the resulting outline to the size you want.

- Use the double-stick tape to secure the outline on top of a sheet a removable contact paper.
- Use the x-acto knife to cut out the profile of your tot.

- Separate the contact paper from your outline.
- You will now have 2 pieces of contact paper, one is the ‘inside profile’ section and the other one is the ‘outside profile’ section. Remove the backing from ‘inner profile’ contact paper and stick it to a piece of paper. Take care to center the profile in the middle of the paper. Repeat with the the ‘outside profile’ section.
- Stick the contact paper down very firmly. Use your fingers to press out any air bubbles and make sure that the contact paper is sealed tightly to the paper. If there are wrinkles, you may have to remove the paper until you get it exactly right. (The paint will run under the edges of the contact paper if there is even a hint of a wrinkle near an edge and ruin the painting.)
- Set up a space for your tot to paint. Cover a table with a protective cover if needed and set out the paints and paintbrush.
- Stick the piece of paper with the ‘inner profile’ on the front of it to the table with double-stick tape.
- Show your tot the paper and hand them a paintbrush. Encourage them to start painting.

- Look closely at the paper and make sure your tot has covered all of the edges of the contact paper with paint. If there is a blank space, the painting will look odd.
- After your tot is done, set the ‘inner profile’ paper aside to dry.
- Stick the ‘outer profile’ sheet to the table and let them paint it. Set it aside to dry after your tot has covered it entirely with paint.
- Allow your tot to keep painting on new sheets of paper until you are tired of watching them. (This will probably happen long before your tot tires of painting.)

- After your 2 pieces of paper dry (8-12 hours), gently find the edge of the contact paper and remove it from each of the sheets. It is somewhat hard to find because it is covered in paint. You may want to use tweezers or a thin bladed knife to get the contact paper started.
Observations: Sweet Pea was incredibly fastidious in her painting. I was surprised at how slowly and carefully she made each stroke. She was upset when she got any paint on the table or on her hands. I might have preferred a speedier approach, but it was not to be. I had to have a rag nearby to clean off her hands whenever she got them dirty before she would continue. She also wanted to use every color we had. She loved painting and did not want to stop. If you would like a really fun activity without all the hassle of this project, I suggested just letting your tot paint on a piece of paper. 🙂

This project involved a lot of work for me, but I thought the end result was pretty spectacular. It would make a great homemade gift for Father’s Day or Christmas. I matted and framed one of the pictures and gave it away to Sweet Pea’s aunt for her birthday. It was a big hit.
Notes from the Trenches: The more detailed you make your outline, the more difficult it will be to cut out. While Sweet Pea’s pretty curls look nice in the finished painting, I was wishing she had a buzz cut by the time I was done.
Note that the instructions on the removable contact paper said that it is removable at first, but becomes permanent after some time. Make sure that you let your tot do their painting soon after you attach the contact sheets to the paper AND that you remove it as soon as the paint is dry. The first time I tried this, I didn’t read that part and stuck down the contact paper several days before I let Sweet Pea paint it. When I finally pulled it off, the top of the paper got torn.
Rating: 1 Star * (Fun)
Sweet Pea is 27 months old.

From: We bought this Melissa & Doug Cutting Food Box at a local toy store.

Observations: This set contains a wooden knife and cutting board, along with several painted wooden food items. Each piece of food is composed of several sections that are held together with Velcro. Using the knife to “cut” the pieces of food apart creates a noise and feeling that is amazingly similar to actually cutting.

I had to show Sweet Pea how to “cut” the food at first, but she quickly learned how to do that independently. Putting the food sections back together again has been a bigger challenge for her. She can put some of the pieces of food together, but not other ones. She has never figured out how to get the 4 avocado sections back together correctly. I actually like the logic puzzle aspect that is involved in putting the sections back together and that it is an appropriate challenge for her.
Sweet Pea has played and played and played with this. She used with it the entire evening we gave it to her and then woke up the next morning and immediately started asking for it again. We bought it over a month ago and it is still one of her favorite toys. I would highly recommend it for other toddlers.

Notes from the Trenches: There are quite a few pieces and occasionally one of them will end up lost in the void. We always make sure we stick everything back together before we put it away to see if anything is lost. When we notice that we are missing a piece and ask Sweet Pea where it is, she invariably says, “Mom ate it.” This usually means it is under the couch.
Rating: 3 Stars * (Fun, Easy, Independent)
Sweet Pea is 27 months old.

From: I saw these nesting multi-colored gift boxes and thought they would make an excellent color sorting activity.
Material:
- Several different colored containers (I bought my gift box set from the party section in Hobby Lobby, but think that colored toddler bowls or nesting cups would work well too.)
- 25-30 Pom-poms which match the colors of each of the containers.
- 1 neutral colored container to hold the pompoms.
- Tongs.

Procedure:
- Set out all of the colored boxes and the container of pom-poms.
- Sit next to your tot and demonstrate carefully using the tongs to pick up a pom-pom. Say, “This pom-pom is blue (or whatever color it actually is). I want to put it in the blue box.”
- Slowly move the pom-pom over the boxes until you find the matching one and say, “Here it is. I’ll put the blue pom-pom in the blue box,” as you drop it in.
- Repeat with another color pom-pom and then let your tot try.
Observations: At first Sweet Pea didn’t understand that we were sorting the pom-poms by color. She just wanted to use the tongs and was moving pom-poms randomly between all of the containers. When she put one in the wrong colored container, I said, “Oh you put a blue one in the yellow box. Let’s put it in the blue box,” and moved it for her. She caught on very quickly and seemed to enjoy sorting them by color once she had the idea.
However, I know in Montessori classrooms the teacher is not supposed to correct a child. Every time I redirect Sweet Pea, I wonder if I should just remain silent and let her do what she wants with the materials.
Every useless help given to the child becomes an obstacle to his development this is not merely philosophy but a fact to which we attach fundamental importance.
– Maria Montessori, Creative Development in the Child, Volume One
When I try influence the way Sweet Pea is doing an activity, I often wonder if I’m making my own mistake. However, if I don’t correct her, then the whole point of the activity might be missed. Obviously teachers correct children all the time in non-Montessori classrooms. I don’t really know enough about educating small children to know how much interference is too much. Does anyone else struggle with this?

Despite my inner conflict, Sweet Pea liked this activity a lot. She definitely enjoyed it more than most sorting activities I have presented. I think it is because she really likes practicing with the tongs. She worked on this for quite some time…
…and then, with unbridled 2-year-old enthusiasm, Sweet Pea broke the tongs in half. It wasn’t pretty.
C’est la vie.
Notes from the Trenches: I regret that I only bought 1 pair of tongs. For $1, it seems like I would have thought to buy a spare.
Rating: 3 1/2 Stars * (Fun, Easy, Independent, Frugal if you are creative – crumpled bits of paper and using a variety of colored containers from your home, for example.)
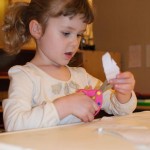
Sweet Pea is 27 months old.

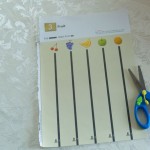
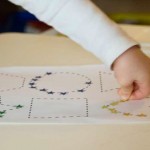
From: This was inspired by my desire for a set of Montessori Insets, which are a bit out our price range right now. (The Montessori Primary Guide has a good description of how to use insets in the Montessori style.)
Material:
Procedure:
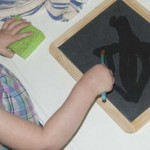
- Tape a piece of paper to the back of the stencil.
- Demonstrate drawing on the inside of the stencil to create a shape.
- Show your tot how to hold the marker correctly and let them try drawing around the inside of the stencil.
 
- Encourage your tot to color in the shape.
- After your tot is done, remove the paper from the stencil and show your tot the shapes that he or she just drew.
Observations: I’ve been looking around for something similar to Montessori Insets. I originally tried using puzzle pieces from a puzzle we own. I think these would work pretty well if Sweet Pea were older, but they were too hard for her right now. I realized that she would have an easier time drawing on the inside of a stencil instead of around the outside of a shape.

Sweet Pea had a much better time with the stencils. She loved this activity and I would definitely recommend it for other tots. I wish I could have gotten a picture of her face when we would peel the paper off of the stencil and she could see the shape that she had “drawn”. She had so much fun. I got tired taping paper to the stencils long before she was ready to quit drawing the shapes.

Notes from the Trenches: It is important to securely tape the paper to the stencil for a young tot. Sweet Pea had trouble holding the stencil in one place and without taping the paper to it, she wasn’t able to make any recognizable shapes.
At first we used regular markers, but I quickly discovered that a lot of ink collected on the plastic stencils. Normally the ink from a marker is immediately absorbed into the paper, but it just sat on top of the plastic stencils until Sweet Pea would touch it and smear it all over her hands and arms. I don’t normally like the Crayola Color Wonder markers and paper because it takes so long for the marker color to ‘develop’ on the paper, but they actually worked very well for this activity.
Rating: 2 Stars * (Fun, Easy)
Sweet Pea is 27 months old.

From: I got the idea for making a life-size portrait from this tot school post on The Shafer Family blog.
Material:
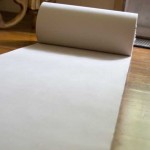
- A large sheet of paper at least as long as your tot is tall. (I suggest using a roll of craft paper or butcher paper, but you could probably just tape several sheets of paper together in a row.)
- Tape.
- Washable markers.
- Damp paper towels or a rag to help with clean up.

Procedure:
- Gather your materials.
- Roll the paper out on the floor and tape it down.
- Ask your tot to lay down on the paper.

- Use a marker to draw an outline around your tot.
- Have your tot stand up.

- Show your tot how to start coloring in portions of the outline and then hand them a marker so they can join in the fun.

- After you are finished, hang up your tot’s picture and admire it together.
- Use the paper towels to clean the marker off of the floor.
Observations: Sweet Pea enjoyed laying down and having me draw her outline way more than she liked coloring in the drawing.
After we drew her outline, she begged (and whined and pleaded for) me to lay down on the paper so she could draw my outline. I quickly envisioned the brightly colored aftermath of such an activity and refused. I tried to carry on with the intended project, however Sweet Pea never quite got over the disappointment of not being able to draw around (and all over) me.
She did have fun once we got started coloring, but she seemed to just want to draw along the lines I had already made. She didn’t understand that I wanted her to fill in the outline, and I didn’t want to push too hard so I just let her color where she wanted.

Sweet Pea’s favorite color is blue and I couldn’t really convince her to use another color of marker. I colored in the hair yellow and tried a little bit to get her to use a red marker on the shirt, but she quickly went back to using the blue one.

Notes from the Trenches: You may notice from the pictures that we changed locations in the middle of this project. As I was about to lay a marker in Sweet Pea’s greedy little outstretched hand for the first time, I had a sudden moment of insight and realized that we needed to move off of the hard wood floor and onto the kitchen linoleum. Save yourself the hassle and start on an easy to clean floor.
Obviously, washable markers are a critical component here. Sweet Pea drew on the kitchen floor quite a bit so being able to wipe up the marker easily with just a sponge was nice. I also think that the markers worked better than crayons because it was so easy for Sweet Pea to mark on the paper with them. She can’t quite press hard enough with the crayons yet.
Also, the butcher paper was a little slicker than I anticipated. I would slightly have preferred to just use a roll of regular craft paper, but I already had the butcher paper and it worked okay. I highly suggest taping the paper down to the floor before having your tot lay on it. We learned the hard way that the paper can be slippery for your tot to walk on.
Rating: 3 1/2 Stars * (Fun, Easy, Frugal if you just use paper & drawing materials from around your house.)
Carnivals: This post is linked at Child Centered Art Party #10 at Art for Little Hands.
Sweet Pea is 27 months old.

From: I saw a glue stick next to us while we were drawing in the sand tray and thought, “Hey, why don’t we try gluing the sand onto some paper?”
Material:
- Non-toxic sand.
- A box or jelly roll pan to hold the sand. It needs to be wide enough that your tot can dump sand off a piece of paper into it.
- Glue stick. (We really love this Crayola one.)
- Paper
Procedure:
- Show your tot how to draw with the glue stick on a piece of paper.
 - Demonstrate picking up a handful of sand and sprinkling it on the glued paper.
 - Pick up the paper and dump the sand off into the box.
 - Show your tot the “drawing” they made with the sand.
- Let your tot try for themselves when they are ready.
- Clean up when you are done and make sure to wash all of the sand off your little one’s fingers so it doesn’t get in his or her eyes.
- After your tot goes to sleep for the night, throw their drawings away to prevent sand from falling off and infiltrating all areas of your house. (Or cover it in contact paper, but we don’t save a lot of “artwork” around here.)
Observations: Sweet Pea loved this so much. She kept saying, “More paper. More paper!” Although this is messy and requires close supervision, it was a really entertaining activity. I think she would have done this for at least an hour if hadn’t stopped her. (I started worrying about the toxicity of the sand I was using. Read the ‘Notes from the Trenches’ on my sandbox drawing post for details regarding my thoughts about the type of sand I bought.) She was very unhappy when I told her that we had to stop. I can’t wait to buy some new non-toxic sand and do this again with her.
Notes from the Trenches: As with my other sand activity, I wish I would have put down newspaper under the table first. There was sand _everywhere_ when we were done and required a vacuum to fully clean up. Part of the problem was that Sweet Pea was just so fascinated by the texture and color of the sand. She just liked rubbing her hands in it, and of course it got everywhere.

I mentioned this already, but it is worth repeating that the sand doesn’t totally adhere to the paper once the glue is dry. Bits of sand will keep falling off every time something brushes against the paper. I advise that you either throw these pictures away or cover them with clear contact paper.
Rating: 3 Stars * (Fun, Easy, Independent)
|
Need Ideas? Do you need some inspiration for activities to do with your own tots? You are in the right place!
You can search by age or activity type using the menus at the top of the page, use the tags on the left, or just check out some of my most popular posts, listed below.
Also, you are encouraged to pin any of my photos to pinterest so long as you include a link back to my blog.
-Shannon
|


 "Pin It")

 "Pin It")

