|
|

Sweet Pea is 37 months old.

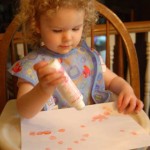
From: The Crafty Crow featured a cute Father’s Day card from No Time for Flashcards and I decided to do something similar for Sweet Pea’s Grandpa.
Material:
- A white piece of paper or card stock.
- A blank card or colored card stock cut and folded into a card shape.
- Masking tape or adhesive vinyl letters. (I had some trouble getting the blue kind off masking tape off of Sweet Pea’s card. Next time I would probably use a less sticky variety.)
- Scissors.
- Do-A-Dot markers (or craft paint and a sponge brush).
- A large sheet of paper to protect your tot’s work surface.
- A smock or bib to protect your tot (optional).
- Tweezers (optional).

Procedure:
- Decide on a word for the front of your card.
- Cut several pieces of masking tape off of the roll and then cut them lengthwise in half (or thirds if you want an even thinner “font”).
- Use the thin strips of masking tape to spell out the word on the front of your card.

- Make several loops of masking tape and use them to stick the card stock to a larger sheet of paper.
- Put a smock on your tot.
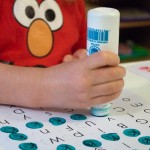
- Ask your tot to choose 3 Do-A-Dot Marker colors for the card. Hand them the lightest color first and let them start dotting the card stock.
- Let your tot continue dotting with the next color and then finally the darkest color. Tell your tot that you want them to try to cover most of the white on the card. Especially make sure that all of the white around the taped word is gone.

- Let your card dry completely. Ours took about 2 hours.

- Carefully remove the tape. You may need to use tweezers to get the tape started.

- Cut out the word and glue it to the front of the card.
Observations: Sweet Pea likes anything that involves the Do-A-Dot Markers, so she had a good time. She did have a hard time getting all of the white covered. Several times she said that she was done, and I would have to point out spots that she had missed. However, she didn’t seem to mind that I wanted her to keep working on the card.

This certainly wasn’t as fast as handing Sweet Pea a piece of folded paper and a box of crayons, but I like the results a lot. The whole thing probably took 3 hours from start to finish, but at least 2 hours of that was drying time.
Notes from the Trenches: If you are making a Father’s Day card and don’t want it to look like a Mother’s Day card, you may need to hide the pink Do-A-Dot marker before asking your tot to choose their colors. I try to let Sweet Pea make lots of choices, but I am not above manipulating the outcome.
The Do-A-Dot markers bled through onto the back of the card stock. I intended for her to work directly on the card we going to give to her grandpa, but once I saw how messy the other side looked, I knew I would have to cut it out and glue it down to another card.
Rating: 1 Stars * (Fun) – But despite the 1 star rating, this was a really good activity.
P.S. Wow, I just realized this was my 100th post!

Sweet Pea is 37 months old.

From: I found this quick little activity on ABC and 123 and The Shafer Family.
Material:
- Popsicle or craft sticks.
- Flat glass gems (We found ours in the floral section at Micheal’s)
- Bowl (to hold the gems).
- Tray (optional).

Procedure:
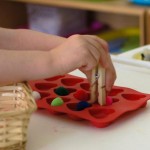
- Put the gems in the bowl and place everything on a table near your tot.
- Place a Popsicle stick on the table and then select a gem out of the bowl.
- Carefully balance the gem on the Popsicle stick.
- Invite your tot to try.

Observations: This did not go over well. To start with Sweet Pea would only use the blue gems.

She quickly balanced most of them and then she was done. I couldn’t get her to use more colors and I couldn’t get her to redo the blue ones.

Other bloggers have mentioned that this activity was a good challenge for their tots and really held their interest. I don’t think it was too hard for Sweet Pea, but she didn’t enjoy it. Sweet Pea soon abandoned the gems entirely and started making letters out of the Popsicle sticks. I just went with it. I helped her build several straight line letters before she was tired of that too.

Balancing the gems seems like it would be a great activity and it was very easy to set up, so I would tentatively recommend it. We will probably try it again with some modifications. I think it would work better if I put some star stickers on the craft sticks and told her to use the gems to cover them up.
Notes from the Trenches: My original idea was to use a package of colored craft sticks I bought from Micheal’s. I was going to have Sweet Pea match the colored gems to the correspondingly colored craft stick as she balanced them. However, the dye from the craft sticks (I think they were from Micheal’s.) bled all over my hands as I was putting them on the tray. Just touching the blue sticks caused the dye to rub off onto my fingers, so I only let Sweet Pea use the yellow sticks which seemed to be the best of the bunch. In any case, I ended up throwing all of the colored ones away. I wish I would have just used plain ones.
Rating: 2 Stars * (Easy, Independent)
Carnivals: This post is linked at One Hook Wonder’s weekly Montessori Monday and Mommy Moment’s Montessori Moment. Take a look at those sites for other great Montessori ideas.

(Sorry if you saw an unfinished version of this in your rss feed earlier. This is the finished post.)

From:
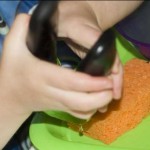
I found this cute “Design-A-Mug” kit at Micheal’s and thought it would make a great Father’s Day craft for Sweet Pea.
Materials:
- Design-A-Mug kit which contains a mug and several “permanent” markers.
Observations:
I had grand ideas about trying The Artful Parent’s nifty glue batik idea. I wanted to test out the technique first so I drew some squiggles in Elmer’s Blue glue on the bottom of the cup and let it dry over night. Then I colored over the dry glue with the “permanent” markers that came with the cup. I waited a couple of hours and then stuck the mug under the faucet to try to dissolve the glue. I was stunned to discover that the marker easily rinsed off of the mug.
I thought maybe the bottom of the mug was a different material than the sides so I tested the marker again on the face of the mug. I let the marker dry over night. The following pictures shows what happened to the ink with a few swipes of my finger under running water.


Am I missing something here? The mug didn’t come with instructions. Was I supposed to bake it or something?
Notes from the Trenches: If you use this kit, make sure to warn the recipient not to actually use the mug because the first time they clean it, all of your tot’s lovely drawings will come right off.
Rating: 0 Stars *

Sweet Pea is 37 months old.

From: I love these Emerald Cocoa Roast Almonds and I bought a huge tub of them from Sam’s Club. However, if I let myself eat them straight out of the jar, I could devour my entire days worth of calories in one sitting. Faced with such a temptation, I wanted to portion the nuts out ahead of time and put each serving in an individual baggie. While I was making up a set of almond baggies, it occurred to me that Sweet Pea could help me with the task.
Material:
- A large quantity of almonds (or any other non-fragile, non-perishable food items. I think nuts, pretzels, jelly beans, m&m, etc would all work well.)
- An ice cube tray that will hold the correct number of items for each portion.
- Several baggies or small Gladware tubs to hold each portion.
Procedure:
- Assemble all your materials and sit next to your tot.
- Tell your tot that they are going to be making up serving size containers of the almonds.
- Take one almond out of the large tub and put it in the first empty space in the ice cube tray as you say, “I am putting 1 almond in each empty space.”
- Continue putting one almond into each space on the ice cube tray. Let your tot take over if they want to help. Pay close attention at first to prevent your tot from doubling up in any of the spaces.

- When all of the spaces are filled say, “Now we are going to put these all in a baggie.” Open a baggie and take each almond out of the ice cube tray and put it into the baggie.

- When all of the nuts are in the baggie, place it on it’s side, hold it down with one hand and run your fingertip along the edge to seal it.
- Let your tot help whenever they are ready.
Observations: This wasn’t Sweet Pea’s favorite activity, but she did work on it for quite a while. I was impressed by how many bags of nuts she was able to complete (maybe 10 or 15) before she got board.

I really like trying to find meaningful work for Sweet Pea to do around the house and I think this activity really qualifies. She has often seen me grab these snack bags when we are headed out the door and loved being able to help me make them.
Notes from the Trenches:
- Be cautious if you use nuts or other items that your tot could choke on. I have often read that children under the age of 5 should not eat whole nuts because of the choking hazard. I don’t let Sweet Pea eat these almonds.
- I didn’t expect Sweet Pea to be able to seal the baggies, but she was surprisingly skilled at it. Despite that, I discovered the hard way that some of the baggies weren’t totally sealed so I had to “reseal” all of them.

Rating: 4 Stars * (Fun, Easy, Independent, Frugal – If it is something you would be doing anyway.)
Carnivals: This post is linked at One Hook Wonder’s weekly Montessori Monday and Mommy Moment’s Montessori Moment. Take a look at those sites for other great Montessori ideas.

Sweet Pea is 36 months old.

From: I saw this in a bunch of places (The Shafer Family, The Adventures of Bear, and My Montessori Journey) and really wanted to do it, but it took me a while to find the non-skid suction mats.
Material:
- 1 Mini non-skid bathtub suction mat. (I had a terrible time finding these, but finally located a set at Bed Bath & Beyond.)
- Eyedropper (I bought a pack of these from Micheal’s.)
- Liquid water color or food coloring (optional). (Warning: Food coloring stains.)
- Small bowl.
- Spoon.
- Water.
- Tray (optional, but recommended to keep the spilled water contained).
- White paper to go on top of the tray so the colored drops show up better (optional).
- Smock or Bib (optional).

Procedure:
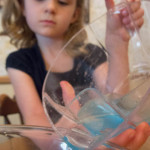
- Fill the small bowl less than halfway full with water. If you are using color, add 1 or 2 drops (just enough to tint the water) of liquid water color or food coloring to the water.
- Place the mat so the suction cups are facing up on the tray and place the water bowl and eye dropper next to it.
- Sit next to your tot and demonstrate carefully holding the bulb of the eye dropper between your thumb and pointer finger of your dominant hand. Show your tot how to squeeze the bulb a couple of times.
- Hold the small bowl steady with your off hand. Squeeze the bulb and then lower the tip of the eye dropper into the water. Gently take pressure off of the bulb so the colored water gets sucked up into the tip of the eye dropper.
- Carefully move the eye dropper so that it is above one of the suction cups on the mat.
- Squeeze the bulb very slowly so one drop of colored water falls from the eye dropper into a suction cup. Continue squeezing, drop by drop, until the entire suction cup is filled with colored water. Then move your hand to the next suction cup and squeeze again to release a new drop.
- Repeat until the eye dropper is empty.
- Instruct your tot to place his or her fingers over yours while you repeat all of the steps (squeeze the bulb, suck in more water, and drop it out again into a suction cup).
- When your tot seems to understand, let him or her try alone.

Observations: This was a huge challenge for Sweet Pea, but she loved it. It was really difficult for her to release the bulb just enough to suck up some of the water. Every time she tried to release the bulb, the entire eye dropper would fall out of her hand. I had no idea what a tough skill it was to regulate the pressure required to suck up some water.

I had to help Sweet Pea fill up the dropper many times before she was able to do it on her own. She did best with squeezing the drops out, but did spill quite a bit of the colored water while she was trying to fill up the little suction cups. However, she did got better as she went along and by the end was totally independent with this activity.

Sweet Pea considered this more of an art project than a lesson on using an eye dropper. As she worked, she kept talking about the pretty flower she was making. She loved everything about it and after she was done with orange, she completed a mat in each of the other colors I had.
This activity completely engaged Sweet Pea. It was a huge success and I would recommend highly recommend it for older tots.
Notes from the Trenches: The only down side was that this activity was so messy. It was a good thing that the liquid water colors we used were easy to clean up, because Sweet Pea got colored water everywhere. You might want to take this one outside.
Rating: 3 Stars * (Fun, Easy, Independent)
Carnivals: This post is linked at One Hook Wonder’s weekly Montessori Monday and Mommy Moment’s Montessori Moment. Take a look at those sites for other great Montessori ideas.

Sweet Pea is 36 months old.

From: The Activity Mom did this quick letter matching activity, which I think originally came from Crunchy and Green.
Material:
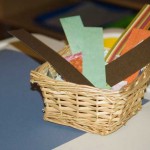
- Alphabet stickers. (You can get these almost anywhere. We found ours at Target.)
- Letter matching worksheets. (Start with the partial alphabets worksheets on the top row and only use the complete alphabet if your tot needs more of a challenge.)
 |
 |
 |
 |
| Upper Case A-G |
Upper Case H-N |
Upper Case O-T |
Upper Case U-Z |
| |
|
|
|
 |
 |
|
|
| Upper Case A-Z |
lower case a-z |
|
|
Procedure:
- Cut the sheet of alphabet stickers into 4 sections. The first section should only contain the letters A-G , the second should contain H-N, next O-T, and lastly U-Z.
- Show your tot the first A-G letter worksheets and the corresponding A-G section of alphabet stickers.

- Peel off the first sticker and search for the corresponding letter on the worksheet as you say, “I have an “A” sticker here. Now let’s see if I can find the letter “A” on this worksheet…”
- When you find the correct letter on the worksheet, stick the sticker to it.
- Let your tot try.

- If your tot stays interested, move on to the other worksheets.
Observations: The first time we tried this, I planned on having Sweet Pea match upper case stickers to the lower case letter worksheet, but that turned out to be far too difficult for her. Next we tried matching upper case stickers to the upper case worksheet with the entire alphabet on it. Unfortunately, this was still too difficult for her and didn’t really hold her interest. However, I’ve included both of those worksheets in the materials section above, in case your tot is ready for them.

In the end, I had to make up new worksheets that only contained a few letters on each one. I also had to cut the stickers sheets into strips so that Sweet Pea was only working with the letters that also showed up on her worksheet. This simplified version kept her attention better, but this still wasn’t really one of our best activities.

I have a feeling that this should have gone over better than it did, but I don’t know why it didn’t keep her interest. However, because this activity is so quick and easy (especially since I’ve already made up the letter worksheets for you), I would probably recommend it. I do think it would be an especially good activity for a tot tray.
Rating: 3 Stars * (Fun, Easy, Independent)
Sweet Pea is 36 months old.

From: I thought these Doodle Rubbings on This Little Project looked really fun.
Material:
- Pencil.
- Hot Glue Gun & Glue Sticks.
- Several pieces of cardboard. (I just cut up an old Pampers box.)
- Paper.
- Crayons.
- Tape.

Procedure:
- Use a pencil to lightly draw shapes (square, heart, circle, etc) on the cardboard.
- Draw over the shapes with a hot glue gun and then let the glue dry.

- Tape one of the cardboard glue plates to the table where your tot will be working.
- Tape a blank piece of paper over the cardboard plate.
- Show your tot how rub the side of a crayon over the paper until the image appears.
- Let your tot try it on his or her own.

Observations: Sweet Pea had a really hard time with this. She just didn’t seem to have enough control to make the rubbings. She enjoyed watching me make them, but wasn’t really able to create them herself.

This would probably be fun for an older child, but Sweet Pea was just too young for it. I wouldn’t recommend it for this age group. I have seen some commercial rubbing plates and we might try those in the future, but I don’t think I’ll try make my own again.
Notes from the Trenches: I think I may have made the glue too thick. The instructions at This Little Project indicated that you should put the glue gun really close the cardboard so that the glue ends up being somewhat flat on the cardboard. My glue was pretty high and somewhat uneven, so that might have been part of our problem. None of our rubbings turned out as nicely good as the ones from This Little Project.
It also took quite a bit of work to convince Sweet Pea to rub with the side of the crayon instead of just drawing with the tip.

Rating: 1 Stars * (Frugal)
Sweet Pea is 36 months old.

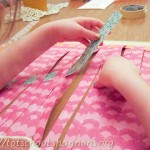
From: I spotted a funnel in my junk drawer and remembered that I had seen “Using a Funnel” on a list of practical life Montessori activities a while ago.
Material:
- Funnel.
- Sink.
- A sturdy chair or step stool.
- Measuring cup or small pitcher.
- Empty water bottle.
- Bib (optional but recommended).

Procedure:
- Put the bib on your tot and gather the rest of your materials near the sink.
- Turn the water on low and adjust the temperature to lukewarm.
- Help your child stand securely on the chair or step stool at the sink.
- Demonstrate setting the narrow end of the funnel into the top of the water bottle.
- Show your tot how to fill up the measuring cup by holding it under the running water until it is about halfway filled.
- Use your non-dominate hand to hold both the funnel and the top of the bottle, while you slowly use your dominant hand to pour the water into the top of the funnel.
- Give your tot the measuring cup and let them try.

Observations: Sweet Pea loves anything involving water so she enjoyed this, although she hasn’t asked about it again. (Unlike say, the Rainbow Toast, which she still brings up often in morning.) She stood at the sink and practiced filling the cup, pouring it into the funnel and dumping the water back out of the bottle many times.

She did have trouble pouring the water into the funnel at first, and sometimes knocked over the water bottle, but quickly improved.

This was a good practical life activity and I would recommend it for older tots. However, it probably requires too much dexterity for younger tots and instead I would suggest just letting your tot Play at the Sink.
Notes from the Trenches: Your child will be playing with water so supervision is critical. Your tot could fall, drown, get burned, etc, etc.
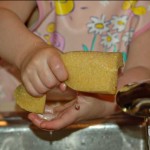
I unwisely set this up at Sweet Pea’s tot school table first. I carefully showed Sweet Pea how to pour the water into the funnel and then sat across from her to take pictures. This is the only picture I was able to get before Sweet Pea begin pouring water all over everything. Ooops. Sometimes I forget she’s only 3. We cleaned up and I quickly moved the activity to the sink.

Rating: 4 Stars * (Fun, Easy, Independent for older tots, Frugal)
Carnivals: This post is linked at One Hook Wonder’s weekly Montessori Monday and Mommy Moment’s Montessori Moment.
Sweet Pea is 36 months old.

From: I was planning on having Sweet Pea make clay votive holders for Mother’s Day gifts, but the Crayola Air Dry Clay I was going to use specifically says, “Do not mold into candle holders or other like items for use around flame.” So we went to Micheal’s to look for another type of clay. I saw some “Pluffy” kid’s clay and decided that it would be fun for Sweet Pea to make a beaded necklace with it instead.
Material:
- Non-toxic clay that can be baked or air-dried.
- Aluminum Foil.
- Beading needle or toothpick.
- Beading wire or string. It must be stiff enough for your tot to poke through the bead hole. (We used 0.7mm Clear Stretch Magic, which was okay but I would look for something prettier next time.)
- Cookie Sheet.
- Baskets or bowls for the baked beads.
- Scissors.
- Smock or bib for your tot.

Procedure:
- Cover your work area with the foil and your tot with a smock.
- Show your tot how to break off a small piece of clay and roll it between his or her hands to make a bead.

- When your tot has finished creating the bead, use the beading needle/toothpick to create a hole all the way through the bead. Despite what the picture below shows, it is best to poke the needle through the shortest part of the bead so your tot will have an easier time stringing it. Also it helps if you roll the needle around a bit to make sure the hole is large enough. (Obviously older kids could do this part by themselves, but the beading needles were somewhat sharp and I didn’t have the patience to help Sweet Pea poke a hole in all of the beads.)

- Being careful not to crush the bead and ruin the hole, place the bead on a foil covered baking sheet. If your beads are very different sizes, arrange the tray so all of the small beads are on one side and the largest on the other. (This helps so you can more easily bake the largest ones for more time than the smaller ones.)
- Repeat until you have enough beads. It is a good idea to wash your tot’s hands before they switch to a new color of clay.
- Bake the clay according to the directions on the package. (15 min @ 275 F per 1/4″ of thickness for the Pluffy beads.)

- If necessary, remove the smallest beads after the first baking and return the larger beads to the oven for 15 more minutes. Repeat as necessary.

- Let the beads cool and place in baskets.

- Put the string through one bead and tie it in place so the beads don’t all run off the end of the necklace every time your tot picks it up.

- Show your tot how to push the string through a bead and pull it all the way to the end.
- Let them string as many beads as they want.

- When they are finished stringing the beads, tie a loop at the unfinished end.

- You can fasten the necklace by slipping the loop over the bead tied to the other end.

- Happy Mother’s Day! Wear or give your necklace away.

Observations: Sweet Pea liked making the beads, but she was confused about how we were going to turn them into a necklace. After I told her we were making necklaces, she immediately started making long “snakes” out of the clay and calling them necklaces. I had to explain many times that she needed to make beads and then we would later string the beads into a necklace.

Obviously this necklace looks like it was made by a 3 year old, but I love it! I am excited by this project because I can imagine how delightful it would be to have 5 or 6 sets of necklaces created over the course of a decade. It would be so interesting to see the improvements in the beads and pattern making over the years.

Notes from the Trenches:
- Creating 4 necklaces in a day was about 3 too many for Sweet Pea. I am apologizing right now to the relative that ends up with the necklace containing only 3 beads on it.
- If you have white clay, use it before any other colors. Our white beads turned out somewhat grungy. The white really picked up tiny pieces of the other clay colors.
- Sweet Pea’s beads were wildly different sizes. If you want the necklace to look a little better, you could cut the clay into same size chunks before letting your tot make beads. However, I really liked the idea of letting Sweet Pea do as much as possible by herself for comparison to future years.
- Even with one of the ends tied, Sweet Pea dumped all of the beads off of the necklaces several times. She didn’t seem too discouraged about it and just kept restringing them again (and again).
- It just occurred to me now, but I really wish I had used the beading needle to scratch the date into the end bead for each of the necklaces.
Rating: 1 Stars * (Fun)
Sweet Pea is 36 months old.

From: I saw this really fun contact paper collage at What Do We Do All Day?
Material:
- Contact paper.
- Scissors.
- Masking (or other removable) tape.
- Several bowls or baskets
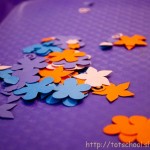
- Different types of materials appropriate for sticking on a collage. (We used scraps of paper, pom poms, wooden shapes and ribbon.

Procedure:
- Find an empty wall or door space for your to tot to create his or her collage.
- Put all of the materials in separate baskets and place them close to the chosen work area.
- Cut off a piece of the contact paper about 12″ wide.
- Start to peel just a bit of the backing off of the contact paper sheet.
- Use tape to stick the top portion of the contact paper sheet to the door.
- Continue peeling the backing off of the contact paper.

- Tape the bottom corners of the contact paper to the door.
- Tell your tot that he or she is going to use the material in the baskets to create a collage.
- Pick up a piece of material and show your tot how to press it against the contact paper to make it stick.
- Let your tot go wild.

- If you want to preserve the collage after your tot is finished, stick another sheet of contact paper over the collage before taking it down from the wall.
Observations: This was a huge it. It may be Sweet Pea’s favorite art project so far. She was so completely absorbed in it that she could barely speak to me.

However, Sweet Pea talked to herself the entire time. Her running commentary went something like, “Pom poms will stick. I putting up decorations. Need to stick my items up there.”

Sweet Pea worked until she had used every bit of material I had given her.

We ended up using her finished collage as a birthday gift for her grandpa:

Notes from the Trenches:
- Either cover the collage with another sheet of contact paper or wait till your tot is away to remove it from the wall. After Sweet Pea was finished, I carelessly pulled the collage off of the wall and a rain of pom poms and wooden shapes fell around us. Sweet Pea started crying and I hastily tried to stick everything back on to the contact paper, as I sort of screamed reassurances at her like, “It’s okay. We’ll fix it! We can re-stick these pom poms!” It was a somewhat disastrous ending to a great activity.
- Make sure that the last thing you do before showing your tot this activity is to put the contact paper up on the wall because once your tot has discovered the sticky stuff, you will not be able to keep him or her away from it.

Rating: 4 Stars * (Fun, Easy, Independent, Frugal if you have contact paper)
Carnivals: This post is linked at Delicious Ambiguity’s Tot Tuesday #16 and Child Centered Art Party #8 at Art for Little Hands.
|
Need Ideas? Do you need some inspiration for activities to do with your own tots? You are in the right place!
You can search by age or activity type using the menus at the top of the page, use the tags on the left, or just check out some of my most popular posts, listed below.
Also, you are encouraged to pin any of my photos to pinterest so long as you include a link back to my blog.
-Shannon
|


 "Pin It")

 "Pin It")

