


Sweet Pea is 36 months old.

From: I saw this really fun contact paper collage at What Do We Do All Day?
Material:
- Contact paper.
- Scissors.
- Masking (or other removable) tape.
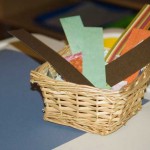
- Several bowls or baskets
- Different types of materials appropriate for sticking on a collage. (We used scraps of paper, pom poms, wooden shapes and ribbon.

Procedure:
- Find an empty wall or door space for your to tot to create his or her collage.
- Put all of the materials in separate baskets and place them close to the chosen work area.
- Cut off a piece of the contact paper about 12″ wide.
- Start to peel just a bit of the backing off of the contact paper sheet.
- Use tape to stick the top portion of the contact paper sheet to the door.
- Continue peeling the backing off of the contact paper.

- Tape the bottom corners of the contact paper to the door.
- Tell your tot that he or she is going to use the material in the baskets to create a collage.
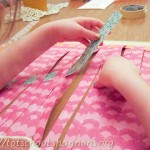
- Pick up a piece of material and show your tot how to press it against the contact paper to make it stick.
- Let your tot go wild.

- If you want to preserve the collage after your tot is finished, stick another sheet of contact paper over the collage before taking it down from the wall.
Observations: This was a huge it. It may be Sweet Pea’s favorite art project so far. She was so completely absorbed in it that she could barely speak to me.

However, Sweet Pea talked to herself the entire time. Her running commentary went something like, “Pom poms will stick. I putting up decorations. Need to stick my items up there.”

Sweet Pea worked until she had used every bit of material I had given her.

We ended up using her finished collage as a birthday gift for her grandpa:

Notes from the Trenches:
- Either cover the collage with another sheet of contact paper or wait till your tot is away to remove it from the wall. After Sweet Pea was finished, I carelessly pulled the collage off of the wall and a rain of pom poms and wooden shapes fell around us. Sweet Pea started crying and I hastily tried to stick everything back on to the contact paper, as I sort of screamed reassurances at her like, “It’s okay. We’ll fix it! We can re-stick these pom poms!” It was a somewhat disastrous ending to a great activity.
- Make sure that the last thing you do before showing your tot this activity is to put the contact paper up on the wall because once your tot has discovered the sticky stuff, you will not be able to keep him or her away from it.

Rating: 4 Stars * (Fun, Easy, Independent, Frugal if you have contact paper)
Carnivals: This post is linked at Delicious Ambiguity’s Tot Tuesday #16 and Child Centered Art Party #8 at Art for Little Hands.


 "Pin It")

 "Pin It")


Love it!
Very cool! I did this w/ my daughter a couple months ago and she LOVED it!!
Ooooh, four stars! So glad it was a hit. And I noticed you have done negative space silhouettes, something that has been on my to-do list forever! Thanks for the link.
We LOVE contact paper in our house, we do a weekly art theme with contact paper and it is always a huge hit! I always colour some rice for Little Mouse – that is by far her favourite object to stick to the contact. We stick ours to her tot table with some press stick / wonderputty. Works great if you want to use something like rice that might not stick as well when it is up on a wall. I always cover it before I take it off, otherwise you have one unhappy little girl if her “creation” is destroyed by mommy!
Oh my! I just saw this pop up on my Facebook from Teach Preschool. I have an extra kid tomorrow (well later today) and I think I have enough stuff to make this happen. Thanks a bunch for this GREAT idea!
I love using contact paper in art projects since it’s practically mess-free. This is a great one to display on the window and let the light shine through.
I love this idea. I think it helps kids so much in doing collages and it is so pretty when finished. We will definitely be using this idea soon. Thanks for sharing on art4littlehands.com.